• Skip to primary navigation
  • Skip to main content
  • Skip to primary sidebar
  • Home
  • Posts
    • Home Care and Cleaning
    • Home Decor and Design
    • Yard Work & Gardening
    • Food & Recipes
    • Pets
    • Health and Wellness
    • Motivation and Self Help
    • Home Tips
    • Parenting Advice & Tips
    • Parties, Events, Holidays, Fun
    • Things That Make Life Easier
    • Home Finance and Budgeting
    • Shopping Advice
  • Cat Central
  • Share a Home Tip
  • Got a Question?

Loving Our Home | Home Tips, Advice, and Easy Recipes

Simple Home Tips and Solutions

Home Decor and Design

3 Must-Have Stylish & Practical Kitchen Appliances

February 10, 2015 By LovingOurHome.com Leave a Comment

Having the right kitchen appliances are key to preparing meals successfully and beautifully. They should also add to your decor and be very functional.

I knew that Amazon would have a great selection of modern appliances to choose from, so I decided to do some browsing to see some of the latest products available. Here are 3 appliances that caught my eye—they will add style to your kitchen and assist you in preparing meals a lot easier.

Keep it Sharp

knife sharpenerOne of the most time consuming tasks that you have to accomplish when cooking is to chop up your vegetables and meats. The key to making this job quicker is to ensure that your knife is nice and sharp. The KitchenIQ 50009 Edge Grip 2 Stage Knife Sharpener efficiently and quickly sharpens your existing knives so that you’ll make quick work of your fruits, veggies and meat. And it’s under 7 bucks, worth every penny.

How Do Chefs Make Everything from Scratch?

food processor
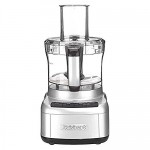
If you are wondering how cooks, chefs and bakers are able to make everything from scratch, it’s because they always have a good food processor handy. The Cuisinart FP-8SV Elemental 8-Cup Food Processor in Silver is a highly rated, stylish machine that will do the job. Just slowly add your ingredients to the processor and allow the machine to do the work for everything from a perfect pie crust to a special sauce or salsa. You can also use it to chop up your vegetables in a hurry for a quick recipe. It’s easy to clean and has 350 watts of power.

Make Pasta like the Masters

pasta roller
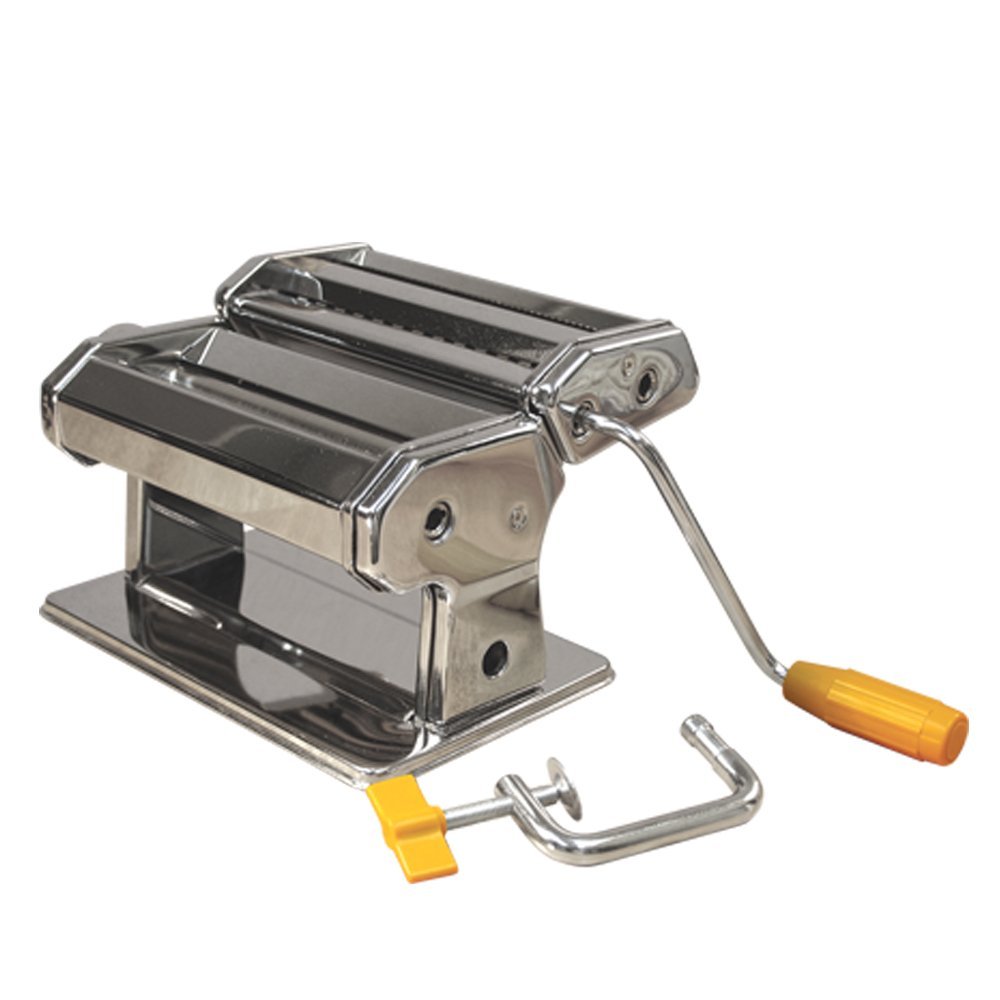
If you love pasta as much as I do, you definitely have to have a pasta machine in your kitchen! The Roma 6 Inch Traditional Style Pasta Machine is a handy little appliance that allows you to make homemade pasta just like the Old World chefs (like Lidia Bastianich) do. No preservatives or additives — just natural ingredients. Just make your pasta (use this recipe and your food processor), place the dough into the machine and turn the roller to create your spaghetti, fettuccine, linguine or lasagna. You can also make ravioli (yum).

Have fun with your new kitchen appliances!

Posted by Jade

Share this:

  • Click to share on X (Opens in new window) X
  • Click to share on Facebook (Opens in new window) Facebook
  • Click to share on Pinterest (Opens in new window) Pinterest
  • Click to share on Tumblr (Opens in new window) Tumblr
  • Click to share on LinkedIn (Opens in new window) LinkedIn
  • Click to email a link to a friend (Opens in new window) Email
  • Click to print (Opens in new window) Print
  • More
  • Click to share on Reddit (Opens in new window) Reddit
  • Click to share on Pocket (Opens in new window) Pocket

Filed Under: Food & Recipes, Home Decor and Design, Shopping Advice, Things That Make Life Easier Tagged With: amazon deals, food process, kitchen appliances, knife sharpener, pasta maker, pasta roller

How to Fix Your Leaning Floor Lamp

January 23, 2015 By LovingOurHome.com 6 Comments

Many of us have discarded a floor lamp that screws together to form a pole and with a light fixture on top. The number one reason is because the pole fails to maintain a tight grip and begins to lean to one side. The lamp leans because the threading has become worn and stripped.

I myself have personally thrown out several floor lamps because of this issue. I was frustrated at how much money I was spending on replacing floor lamps. So early one evening I dismantled my leaning floor lamp and forced myself to think of a solution. After a couple of hours, I figured out the best way to fix this issue and have my floor lamp looking straight again.

1- unplug the floor lamp

2- unscrew the section that is loose

3- take a small piece of duct tape and wrap it around the inner grooves of the pole

4- reattach pole and screw on until tight

Pic of Leaning Floor Lamp

Pic Of Lamp Unscrewed

Pic of Lamp With Duct Tape Added to the Inside

Pic of Straight Lamp

Problem solved!

Posted by Lorraine

Share this:

  • Click to share on X (Opens in new window) X
  • Click to share on Facebook (Opens in new window) Facebook
  • Click to share on Pinterest (Opens in new window) Pinterest
  • Click to share on Tumblr (Opens in new window) Tumblr
  • Click to share on LinkedIn (Opens in new window) LinkedIn
  • Click to email a link to a friend (Opens in new window) Email
  • Click to print (Opens in new window) Print
  • More
  • Click to share on Reddit (Opens in new window) Reddit
  • Click to share on Pocket (Opens in new window) Pocket

Filed Under: Home Decor and Design, Home Improvement, Home Tips Tagged With: floor lamp replacement, leaning floor lamp, lighting

Tips for Decorating with Contact Paper

January 2, 2015 By LovingOurHome.com Leave a Comment

If you want a new look in your home, try adding subtle pops of color to your home decor. If you don’t want the extra fuss of painting and all that goes with it, have you ever tried contact paper? Contact paper is easy to use and comes in a wide variety of colors and patterns. It’s as easy as peeling off the back and applying it wherever you want. Best of all, it’s not permanent. You can always just peel it off and try something new. Here are some fun and easy tips for decorating with contact paper.

41z1nfxabBL– In the living room, create one “faux wallpaper” accent wall with contact paper. Measure the wall’s length and width to ensure that you purchase enough contact paper.

– For the kitchen, apply contact paper to reface your kitchen cabinets. This is a quick and simple way to make your kitchen look more modern and colorful. Carefully use a box cutter to make straight cuts when removing excess paper.

– Add contact paper to the backsplash behind your sink in the bathroom to make it more appealing and colorful.

– In the bedroom use contact paper to give a pop of color to your night stands. Apply an attractive pattern to the top of each stand. Make sure to remove any dust so that the paper adheres properly.

Have fun decorating with contact paper this weekend!

Posted by Eve

Share this:

  • Click to share on X (Opens in new window) X
  • Click to share on Facebook (Opens in new window) Facebook
  • Click to share on Pinterest (Opens in new window) Pinterest
  • Click to share on Tumblr (Opens in new window) Tumblr
  • Click to share on LinkedIn (Opens in new window) LinkedIn
  • Click to email a link to a friend (Opens in new window) Email
  • Click to print (Opens in new window) Print
  • More
  • Click to share on Reddit (Opens in new window) Reddit
  • Click to share on Pocket (Opens in new window) Pocket

Filed Under: Home Decor and Design, Home Improvement, Home Tips Tagged With: bathroom, bedroom, contact paper, decor, decorating, home decor, home decorating, kitchen, living room, wallpaper

Decorating Your Living Room for the Holidays on a Budget

December 11, 2014 By LovingOurHome.com Leave a Comment

Most Americans, especially those with children, love to turn their homes into a holiday winter wonderland complete with lights, stockings, door wreaths and music. This is especially in the living room, where the family spends most of their time.

There are so many ways to beautifully and simply decorate your living room for the holidays on a budget. I have a few tips to get you started. All of the items I am suggesting you use, can be easily purchased at your local Dollar Store, with the exception of the glue and glue gun.

So, first set your budget and write a list. Include:

– wrapping paper

– bows

– lights

– garland

– holiday arts and crafts

  • A glue gun can be your best friend when decorating. Reason being, is when the glue cools it stays adhered to the object, yet, it is easy to remove. Start by attaching little red holiday bows around any mirrors that you have in your living room using your glue gun.
  • Next, wrap your end tables with holiday wrapping paper to resemble gifts. If you do not have extra wrapping paper, simply use brown paper bags and the red ribbon. Make sure to tie the ribbon into a bow, so that it again resembles a gift.
  • Purchase white, red or green candles at the dollar store — it’s a simple and affordable way to add to your holiday decor.
  • Another way to beautify your living room is to purchase colorful garland to wrap your staircase railings.
  • Another suggestion is to purchase colorful balls in the arts and craft section of the store. Put those balls into any clear vases or trays you may have in the living room. You can even buy assorted colorful wrapped candy to put into a clear bowls of any size around the living room.
  • Finally, I have even found traditional holiday classic CDs at the dollar stores and discount stores. They’re songs that everyone knows and can sing along to.

Be creative, include the kids, play music and have fun this holiday season!!

Posted by Eve

Share this:

  • Click to share on X (Opens in new window) X
  • Click to share on Facebook (Opens in new window) Facebook
  • Click to share on Pinterest (Opens in new window) Pinterest
  • Click to share on Tumblr (Opens in new window) Tumblr
  • Click to share on LinkedIn (Opens in new window) LinkedIn
  • Click to email a link to a friend (Opens in new window) Email
  • Click to print (Opens in new window) Print
  • More
  • Click to share on Reddit (Opens in new window) Reddit
  • Click to share on Pocket (Opens in new window) Pocket

Filed Under: Home Decor and Design, Parties, Events, Holidays, Fun Tagged With: holiday decor, holiday decorating, living room

What Paint Color Goes with Chocolate Brown Bedding?

August 13, 2014 By LovingOurHome.com Leave a Comment

If you’re starting your room design with chocolate brown bedding, here’s the great complementary color to consider.

chocolate brown and blueChocolate brown is a rich and serene color. It can make a bedroom look more mature, formal and sophisticated. If you’ve settled on this color for your bedding, you must then consider an ideal color for your wall paint. Being that chocolate brown is one of my favorite colors, I have a personal preference when it comes to matching it up with another one of my favorite colors: blue.

According to color theory, complementary colors are located directly across from each other on the color wheel. Click here to view a color wheel. Complementary colors almost always look good together, so it’s a good practice to have a color wheel handy when designing your bedroom and deciding on a color scheme.

chocolate brown and blue2If you look at a good color wheel you’ll see that there are a number of shades of each color, including browns which are located between red and yellow. On the color wheel brown is across from shades of blue. It’s no wonder chocolate brown and blue look good together when you’re designing a bedroom or other room of your home.

So since brown and blue complement each other, focus on shades of blue when deciding on a wall paint color to go with your chocolate brown bedding. Get a lighter shade of blue, such as sky blue, turquoise or baby blue to brighten up the bedroom (you can see how these colors go together in the bedding photos here).

When picking a trim color for your wall (trim is the frame around your doors and windows) consider a darker shade of blue or an eggshell color to finish off the bedroom’s color scheme. A medium to dark hardwood floor also complements these two colors well.

Additional Accoutrements

710BjFUll6L._SL1500_Once you have your chocolate brown bedding and blue color scheme finished, you can start adding accoutrements, like window drapes and decorative elements. Match window drapes to the bedspread with either the same chocolate brown or a lighter shade of brown (such as a deep tan). Patterned drapes, such as a vertical stripes with that chocolate brown color in the pattern, is another great pick. Add a lamp the color of your dark blue trim as well to even out the décor if you’d like.

You don’t have to limit yourself to blue-start with this idea of color complements and examine the color wheel to come up with even more exciting color combinations to go with that beautiful chocolate brown colored bedding. Hope this helps answer your question of what goes with chocolate brown bedding in a bedroom!

Posted by Jade


Share this:

  • Click to share on X (Opens in new window) X
  • Click to share on Facebook (Opens in new window) Facebook
  • Click to share on Pinterest (Opens in new window) Pinterest
  • Click to share on Tumblr (Opens in new window) Tumblr
  • Click to share on LinkedIn (Opens in new window) LinkedIn
  • Click to email a link to a friend (Opens in new window) Email
  • Click to print (Opens in new window) Print
  • More
  • Click to share on Reddit (Opens in new window) Reddit
  • Click to share on Pocket (Opens in new window) Pocket

Filed Under: Home Decor and Design Tagged With: blue paint, brown and blue decor, chocolate brown bedding, chocolate brown bedroom, chocolate brown decor, paint colors

A $2 Solution to Secure Your Fitted Sheets So that They Don’t Slide Around

July 25, 2014 By LovingOurHome.com Leave a Comment

One of my biggest pet peeves is having my fitted sheets slide off the bed while I’m sleeping or trying to watch Netflix in peace. It’s messy, uncomfortable and you have to re-tuck the sheet back under your mattress each morning. Madness.

The simple solution to secure your fitted sheets is to get a pair of what are called Sheet Suspenders. They use suspender-like straps to secure either side of the fitted sheet beneath the mattress using clips.

But I felt like going the cheaper route, so I went to the dollar store and picked up 2 things:

– an elastic bandage (about 3″ wide)
– binder clamps (the type you use to hold a thick stack of paper)

IMG_1474

$2 … Pick it up! (That’s a little expression my friends and I used to say when something was really easy, peasy).

You can probably already get a visual of what the plan is here.

First, I measured the width of the bed. The bed I was fitting was 39″ (yes, just enough room for me and my cat, don’t judge me!!).

I cut the elastic bandage so that it was a few inches less than the width of the bed (about 36″) because it needs to stretch a bit.

Next, I folded the bandage in half (lengthwise or widthwise) and used two binder clamps to hold it closed. This was just so that I could cut the bandage do that it was thinner.

IMG_1475

IMG_1476

Once it was cut, I took the end of one piece and looped it into the handle of one of the binder clamps. I double knotted the elastic band for security, then repeated the process on the other end of the band.

When you’re done you’ve got a crude version of a suspender strap for your fitted sheet.

IMG_1477

It isn’t pretty, but who is going to see what’s going on under your mattress?

I took one clamp and connected it to the bottom of one side of the fitted sheet, then pulled it over to the other side to clamp that side in place. Repeat the process on the other side. Hold in your core while you’re lifting the mattress — you can do it!

Voila — a quick $2 solution to secure your fitted sheets and prevent them from sliding off while you’re sleeping. Got a better suggestion for securing fitted sheets so that they stay in place? Post it in the comments below!

Posted by Jasmine


Share this:

  • Click to share on X (Opens in new window) X
  • Click to share on Facebook (Opens in new window) Facebook
  • Click to share on Pinterest (Opens in new window) Pinterest
  • Click to share on Tumblr (Opens in new window) Tumblr
  • Click to share on LinkedIn (Opens in new window) LinkedIn
  • Click to email a link to a friend (Opens in new window) Email
  • Click to print (Opens in new window) Print
  • More
  • Click to share on Reddit (Opens in new window) Reddit
  • Click to share on Pocket (Opens in new window) Pocket

Filed Under: Home Care and Cleaning, Home Decor and Design Tagged With: bedding solutions, mattress, secure fitted sheets, sheet suspenders

  • « Go to Previous Page
  • Page 1
  • Page 2
  • Page 3
  • Go to Next Page »

Primary Sidebar

Categories

  • Beauty Tips
  • Cat Central
  • Dating, Love and Relationships
  • Food & Recipes
  • Health and Wellness
  • Home Buying or Renting
  • Home Care and Cleaning
  • Home Decor and Design
  • Home Equipment and Appliances
  • Home Finance and Budgeting
  • Home Improvement
  • Home Tips
  • Life Thoughts by Jas
  • Light Simple
  • Motivation and Self Help
  • Parenting Advice & Tips
  • Parties, Events, Holidays, Fun
  • Pest Control
  • Pets
  • Product Reviews
  • Quick Tips
  • Quotes
  • Shopping Advice
  • Special Deals
  • Summer Products
  • The Funnies
  • Things That Make Life Easier
  • Uncategorized
  • Yard Work & Gardening

Copyright © 2025 · Genesis Sample on Genesis Framework · WordPress · Log in