• Skip to primary navigation
  • Skip to main content
  • Skip to primary sidebar
  • Home
  • Posts
    • Home Care and Cleaning
    • Home Decor and Design
    • Yard Work & Gardening
    • Food & Recipes
    • Pets
    • Health and Wellness
    • Motivation and Self Help
    • Home Tips
    • Parenting Advice & Tips
    • Parties, Events, Holidays, Fun
    • Things That Make Life Easier
    • Home Finance and Budgeting
    • Shopping Advice
  • Cat Central
  • Share a Home Tip
  • Got a Question?

Loving Our Home | Home Tips, Advice, and Easy Recipes

Simple Home Tips and Solutions

Yard Work & Gardening

Organic Raised Garden Box: How I Did It

July 8, 2019 By LovingOurHome.com Leave a Comment

How I made a 3 x 5 foot garden box so that I could grow a small raised organic garden.

I’ve been envisioning this project for some time now, and finally put things into motion last month. The soil on my property isn’t the best, and I’ve sprayed it with Ground Clear on several occasions in the past, so I knew that if I decided to start a garden it would have to be in a raised box with new, fresh soil added in. I decided to fill the box with half regular soil, half organic soil to keep the cost reasonable. I would say this entire project cost me about $125. Before I get into my steps, this is what it looks like now:
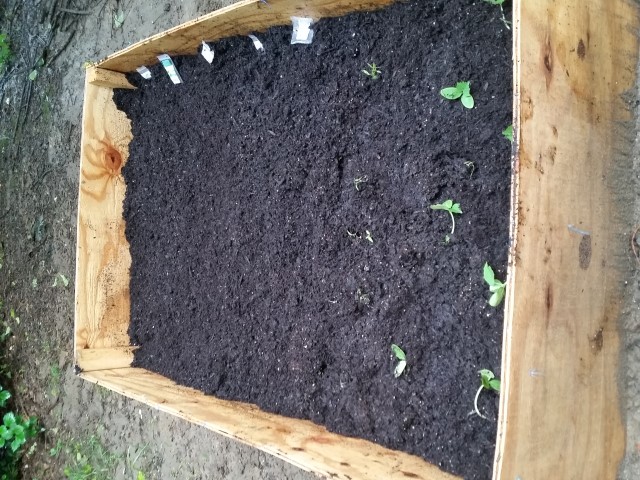
Raised Garden Box

These are the steps I took to create my organic raised garden box.

Step 1: Drawing Up the Plans

The first step of creating a raised garden box is determining how large and deep you want it to be. I decided on 3 x 5 feet, with a depth of about 2 feet. The depth you choose will depend on the types of vegetables you want to grow — some, like tomatoes, require about 18 inches, while others only need about six inches for proper root growth.

Step 2: Shopping for Wood and Supplies

I got help on this step from the guy at my local hardware store. I found a large plank of plywood that cost about $19. It was sized just right so that I could have it cut to two (2) five foot pieces, and two (2) three foot pieces. Note: from what I’ve learned, it’s fine and probably preferable to choose pre-treated wood for an organic garden — it helps avoid rot and the potential effects of insects. I used my own organic treatment mixture to help protect the wood (lemon, vinegar, water, peppermint spray) but I think the pre-treated wood is fine. After cutting the plank into four pieces, the guy in the hardware store recommended anchoring them with 2 x 4 posts at the corners with screws (see the photo below for clarity). He cut the large 2 x 4 post into 4 equal posts. I also purchased a box of outdoor screws.
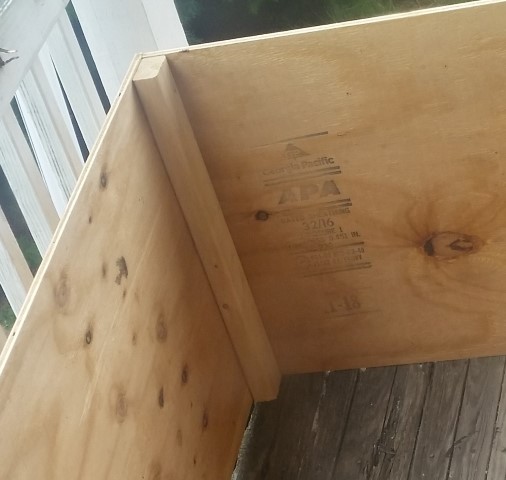
Step 3: Assembling the Raised Garden Box

Keep in mind that you need to keep the bottom of your garden box open so that water can filtrate into the ground. So you only need to assemble the sides. I used a drill to place three screws at each corner/side, with the 2 foot post on the inside corner as the anchor. Again, it sounds complicated, but not really — just look at the photo. When assembled it looked like this:
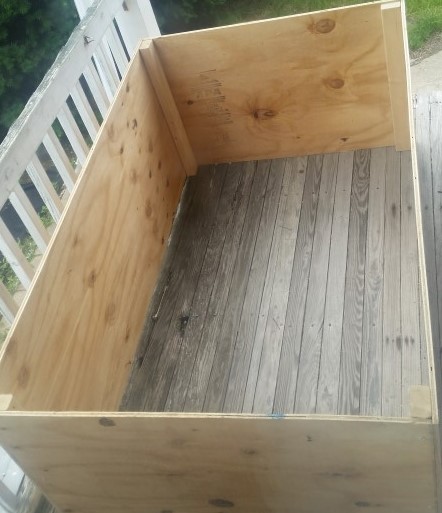
Step 4: Choosing a Location for Your Raised Organic Garden Box

Choose a place for your box that will get at least four hours of direct sunlight each day for the best results. I placed the box down, then traced an outline of it with my shovel. I then removed the box again and dug about two inches down inside the rectangle. This was to ensure that the box would stay in place. I then put the box back inside the rectangle and used the excess soil to shore it up around the sides. I also laid excess treated wood at the bottom of the box to help minimize the chance of anything being about to dig under the soil.
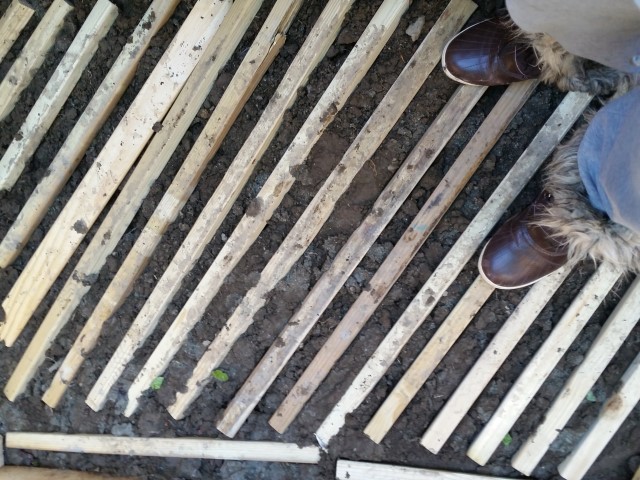
Step 5: Fill Your Organic Raised Garden Box with Soil

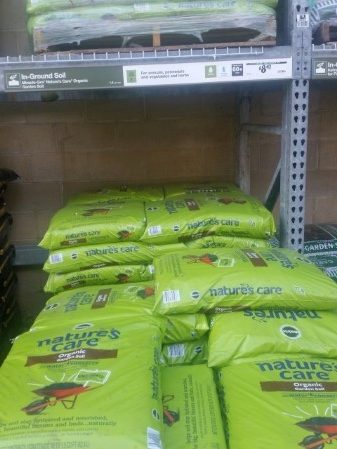
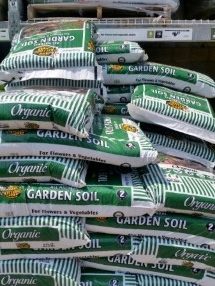
As you probably know, organic soil isn’t cheap. It costs about $8-$10 per 1.5 cubic foot bag. I decided to fill the box with about 20 cubic feet of soil and used a mix of top soil (at the bottom; about $1.25 per 1.5 cu feet) and organic soil (at the top). I probably spent about $75. I used a mix of these two organic soils:

Step 6: Plant Your Seeds

When you’ve finally done all of this work, planting your seeds will be the fun part. I planted a few cucumber and tomato seeds in a separate bucket will doing all the other steps so that they’d have a head start.

Step 7: Water and Tend to Your Garden

After you’ve finished setting up your raised organic garden box and planting your seeds, the next step is to set up automatic watering, surround it with rabbit fencing if needed, and tend to your plants.

Enjoy!

Share this:

  • Click to share on X (Opens in new window) X
  • Click to share on Facebook (Opens in new window) Facebook
  • Click to share on Pinterest (Opens in new window) Pinterest
  • Click to share on Tumblr (Opens in new window) Tumblr
  • Click to share on LinkedIn (Opens in new window) LinkedIn
  • Click to email a link to a friend (Opens in new window) Email
  • Click to print (Opens in new window) Print
  • More
  • Click to share on Reddit (Opens in new window) Reddit
  • Click to share on Pocket (Opens in new window) Pocket

Filed Under: Yard Work & Gardening Tagged With: gardening tips, organic garden

Summer Products That Are Must-Haves

June 8, 2017 By LovingOurHome.com Leave a Comment

Share this:

  • Click to share on X (Opens in new window) X
  • Click to share on Facebook (Opens in new window) Facebook
  • Click to share on Pinterest (Opens in new window) Pinterest
  • Click to share on Tumblr (Opens in new window) Tumblr
  • Click to share on LinkedIn (Opens in new window) LinkedIn
  • Click to email a link to a friend (Opens in new window) Email
  • Click to print (Opens in new window) Print
  • More
  • Click to share on Reddit (Opens in new window) Reddit
  • Click to share on Pocket (Opens in new window) Pocket

Filed Under: Product Reviews, Summer Products, Yard Work & Gardening Tagged With: summer products

The Best Way to Get Rid of Yard Weeds in Grass

June 6, 2017 By LovingOurHome.com Leave a Comment

I love the beauty that comes with the arrival of spring… the birds chirping, sun shining and freshness in the air. But one thing I dread is the arrival of yard work. Having to drag yard tools around, pull out the lawn mower and apply bug repellent. One of the biggest annoyances is the overgrowth of yard weeds in the grass.

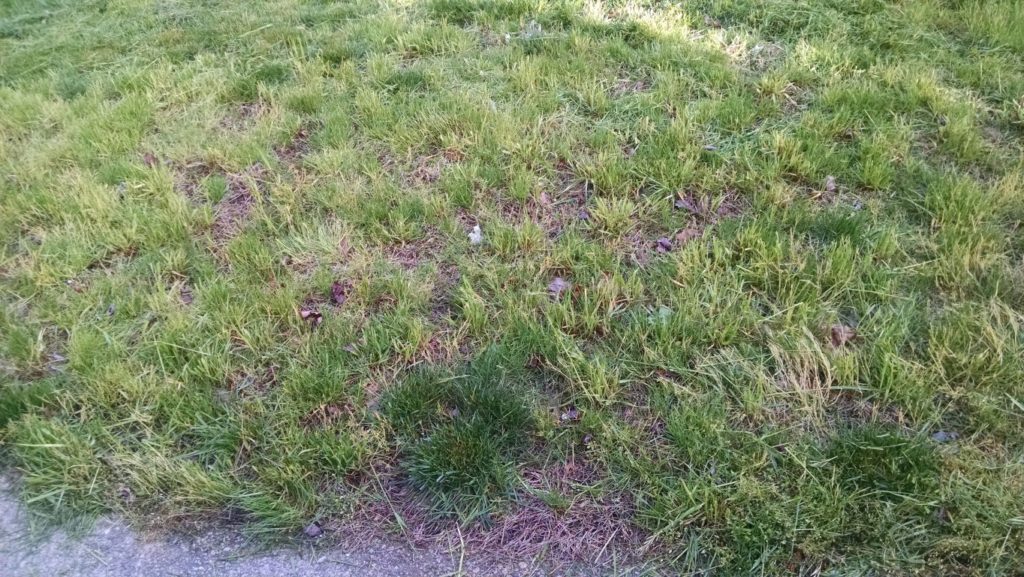
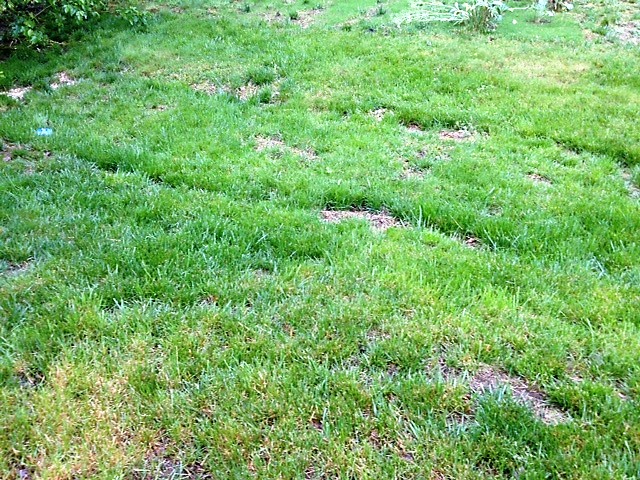
This year, this is the situation I was presented with:

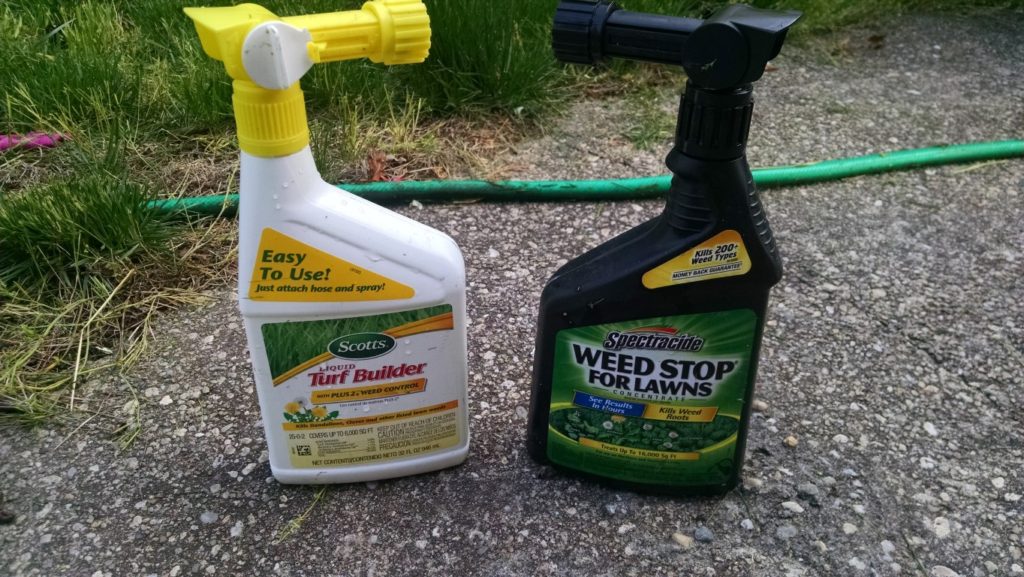
Yikes. The weeds were so high in some places that I had to mow first before trying any sort of weed treatment. I was careful to only mow in the areas that had weeds to avoid spreading seeds in other areas of the lawn. After sweating away in the April sun with the lawn mower, I decided to use a combination of the two following yard weed control products:

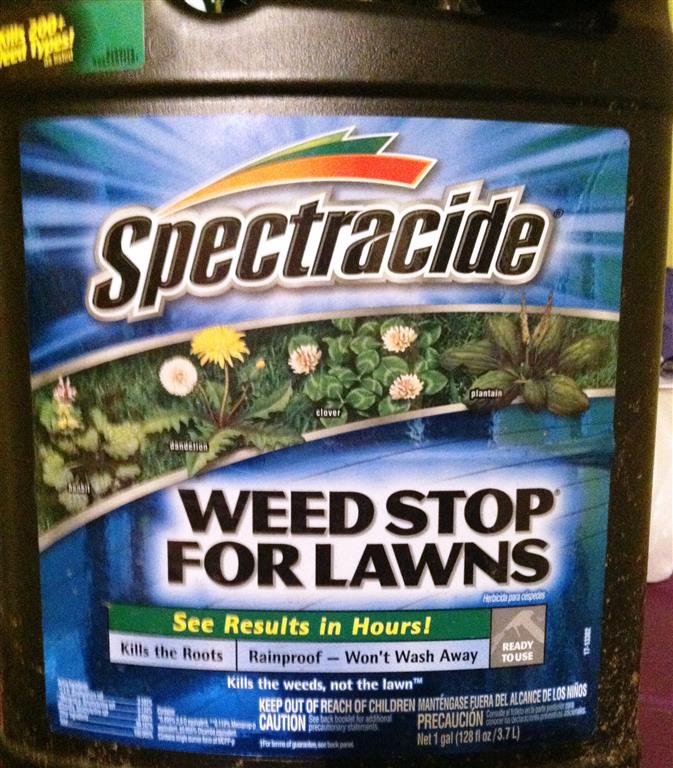
I used the Scotts Turf Builder (with Weed Control) spray first, then went back in with the Spectracide Weed Stop for Lawns. They treat different types of weeds, so I wanted to make sure all bases were covered. I know the instructions say to use only a certain amount per square yard but I decided to use it all in the specific area of concern. These are both products that you can link to a hose and spray leisurely while you listen to an audiobook or music on your earphones. (My personal favorite is opera music.)

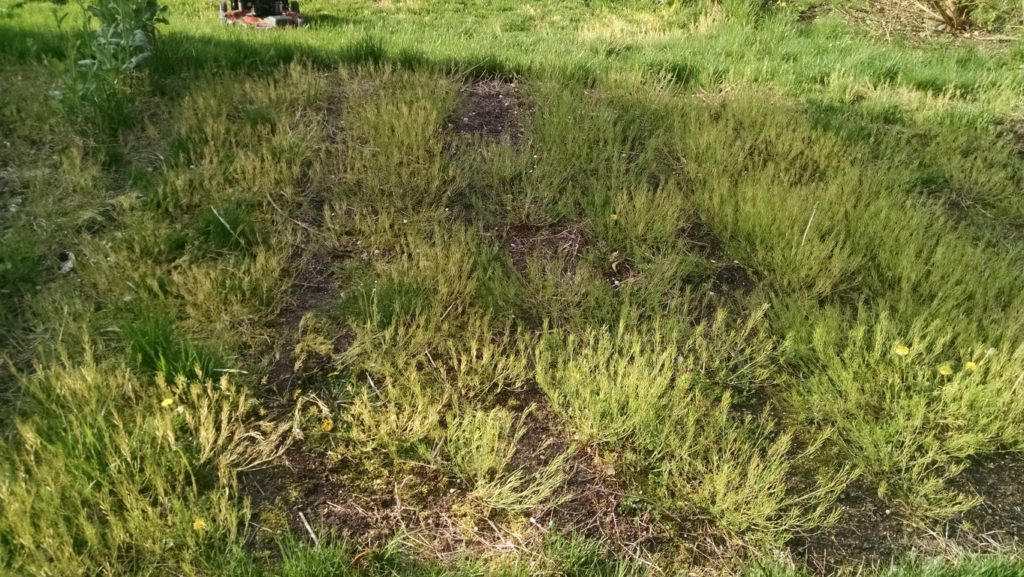
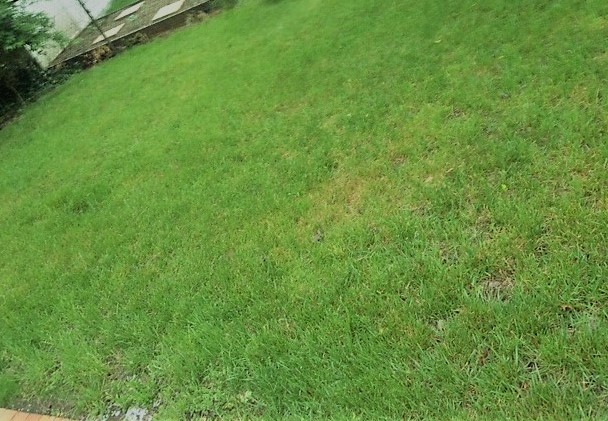
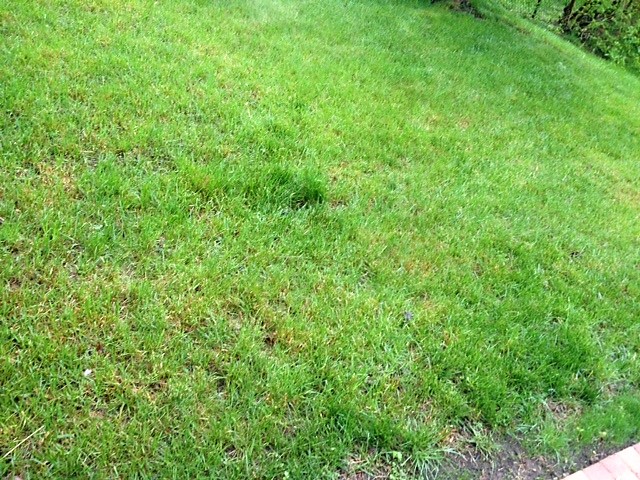
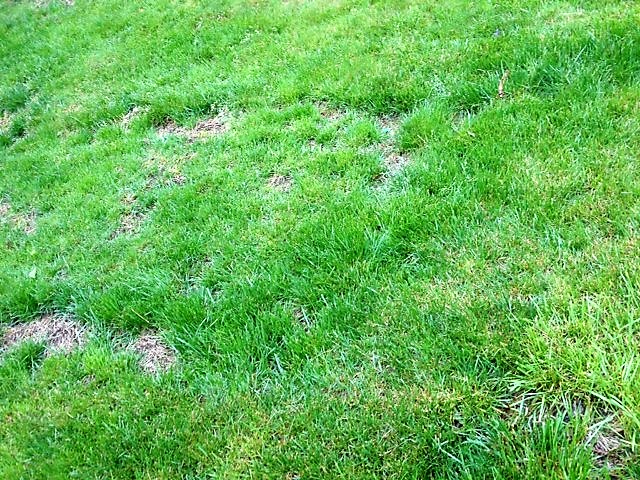
About a month later, this is what the treatment did for the lawn and yard weeds:

Yay! Something that finally worked for getting rid of yard weeds in grass. Seeing the grass look this weed-free was a relief. Now I just have to do a little overseeding and watering to fill in the bare spots. I’m confident that by next year the grass will look absolutely amazing.

Posted by Louise

Share this:

  • Click to share on X (Opens in new window) X
  • Click to share on Facebook (Opens in new window) Facebook
  • Click to share on Pinterest (Opens in new window) Pinterest
  • Click to share on Tumblr (Opens in new window) Tumblr
  • Click to share on LinkedIn (Opens in new window) LinkedIn
  • Click to email a link to a friend (Opens in new window) Email
  • Click to print (Opens in new window) Print
  • More
  • Click to share on Reddit (Opens in new window) Reddit
  • Click to share on Pocket (Opens in new window) Pocket

Filed Under: Yard Work & Gardening Tagged With: gardening, grass, lawn, weed control, yard

Five Basic Steps to a Lush, Green, Weed-Free Lawn

August 7, 2016 By LovingOurHome.com 3 Comments

Are you finally ready to get serious about getting your lawn greener and healthier? See these basic grass care tips.

I spent years trying to figure out how to get rid of annoying weeds and get a healthy looking grass lawn—now I’m a bit of an agricultural maven. If you’re struggling with your lawn year after year, use these five basic steps to achieving a lush, green, weed-free lawn. You must implement each step with consistency and be patient—with time you’ll see positive results.

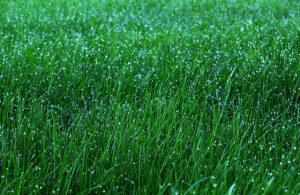
Green Grass

1. Understand Your Lawn

The first step to having a green lawn is to understand what makes your lawn tick. Grass is a plant like any other plant. It has roots that need nourishing and support. Understand that your lawn needs three basic things to stay lush and green: water, sun and quality fertilizer. These three elements work together to strengthen your grass roots so that they each blade of grass can thrive. If one of these elements isn’t in the picture, it’s difficult for the lawn to continue to grow healthy and green.

2. Treat with Fertilizer Starting in Early Spring

As soon as the last frost is over, it’s time to start feeding your lawn. Fertilize it with a good lawn fertilizer. Pick the kind of grass fertilizer that comes in granules that you can spread evenly—granules are the best when it comes to coverage in my opinion. If you have a major issue with weeds each year, pick a good Weed and Feed fertilizer (granules that you can work into the dirt). Sometimes weeds grow year in and out because there are dormant seeds in the soil. Apply the granules exactly according to the instructions on the product bag and on your spreader. Always take that extra few minutes to read the instructions because it can make all the difference.

If you have spots in your lawn that are light or turning brown, add new grass seed in addition to the fertilizer. Water thoroughly right after the first feeding. Feed your lawn every 4-6 weeks after that all the way into the fall season. The way you treat your lawn in the fall will have an impact on how it develops in the early spring.

3. Water on a Schedule in the Summer

As soon as the temperatures start to hit about 60-65 degrees, it’s time for more regular watering. Experts suggest watering at least twice per week for at least 15-30 minutes. The goal is 1.5 inches per week, which you can measure by putting a small tuna can near the watering area. Rainfall should take care of the rest, but if there is a long period of time without rain, add an extra day or two to the watering schedule. Use a water timer, hoses and sprinklers to ensure that the lawn is watered consistently.

4. Spray for Weeds Every Other Month

Unfortunately, weeds don’t need that much to thrive. All they need is just a little water and sunshine. And they really love it when it rains. You have to actively spray for weeds while they’re growing to keep them at bay. I suggest using an effective weed killer at least once every other month and a bit more frequently in stubborn cases. Use a product that you can spray evenly over the weed prone area. Don’t overapply—again, take the time to read the label of your weed killing product for guidance.

An important note: Try different lawn-friendly weed products until you hit the sweet spot. I tried a number of different brands and formulations until I finally hit the jackpot and found a product called Ortho Nutsedge Killer that eliminated all of the weeds in my yard within days.

5. Mow Every 10-14 Days Instead of Every Week

Why recut an already low cut lawn? If the grass is still low, why cut it again? Maybe it’s to always have that perfectly manicured look. But instead of mowing weekly, try a schedule of 10-14 days — especially if your lawn is struggling a bit at the moment (dry and brown). If you hire someone to mow, see if you can get them to come two or three times per month instead of weekly.

It takes time, patience and regular attention to get your lawn green, healthy and weed-free. It took me close to 10 years of trial and error to finally get an effective schedule together. Follow these basic steps to a greener lawn starting in the early spring of each year.

Posted by Louise

Photo credit: Flickr/Sam DeLong


Share this:

  • Click to share on X (Opens in new window) X
  • Click to share on Facebook (Opens in new window) Facebook
  • Click to share on Pinterest (Opens in new window) Pinterest
  • Click to share on Tumblr (Opens in new window) Tumblr
  • Click to share on LinkedIn (Opens in new window) LinkedIn
  • Click to email a link to a friend (Opens in new window) Email
  • Click to print (Opens in new window) Print
  • More
  • Click to share on Reddit (Opens in new window) Reddit
  • Click to share on Pocket (Opens in new window) Pocket

Filed Under: Home Improvement, Yard Work & Gardening Tagged With: green lawn, lawn care, weed-free

Product Review: Spectracide Weed Stop For Lawns

July 2, 2016 By LovingOurHome.com Leave a Comment

I was in desperate need of a fast-acting weed killer, like yesterday. I have family members who are allergic to bee stings. The problem with one variety of weed that was overgrowing on my grass was that it had a white flower that attracted bees everyday. After looking around for an affordable and proven product I gave Spectracide Weed Stop For Lawns a try. I’m glad I did, especially considering that many weed products on the product are hit and miss.

Spectracide Weed Stop for Lawns
This one worked for us. Keep in mind that the product labeling may be different in certain areas.

Benefits
~ one gallon size container
~ easy to use sprayer
~ kills over 200 types of weeds (see full list here)
~ doesn’t harm or burn lawn in any way
~ results shown within 24 hours – fast acting
~ rain resistant

After applying this product on a Tuesday, I saw the  weeds dying off the very next day. Everyday thereafter, I saw a great difference in the amount of weeds. I was also very pleased that none of my grass was affected by the weed stop. I even have enough product left over for next season. Keep in mind that this particular bottle is best for spot treatments–if your lawn is overrun with weeds, use the Spectracide Weed Stop Concentrate instead. Pour the recommended amount (see the label for instructions) in a spray bottle with a hose hook up. Fill the rest of the bottle with water and hook it up to a hose for widespread application. But be careful not to use too much — about a minute in each area will suffice.

* Keep in mind that some lawns and weed mixtures are different, so certain products will work better than others on your unique lawn. Try out various brands to find out which one is most reliable for your own lawn, then you can just stock up on that brand each year.

I recommend Spectracide Weed Stop For Lawns if you want something that will help keep your lawn green while getting rid of annoying weeds.

Review by Lorraine


Share this:

  • Click to share on X (Opens in new window) X
  • Click to share on Facebook (Opens in new window) Facebook
  • Click to share on Pinterest (Opens in new window) Pinterest
  • Click to share on Tumblr (Opens in new window) Tumblr
  • Click to share on LinkedIn (Opens in new window) LinkedIn
  • Click to email a link to a friend (Opens in new window) Email
  • Click to print (Opens in new window) Print
  • More
  • Click to share on Reddit (Opens in new window) Reddit
  • Click to share on Pocket (Opens in new window) Pocket

Filed Under: Shopping Advice, Yard Work & Gardening Tagged With: lawn care, lawn maintenance, weed control, weed stop

Review: Preen Organic Vegetable Garden Weed Preventer

June 4, 2016 By LovingOurHome.com Leave a Comment

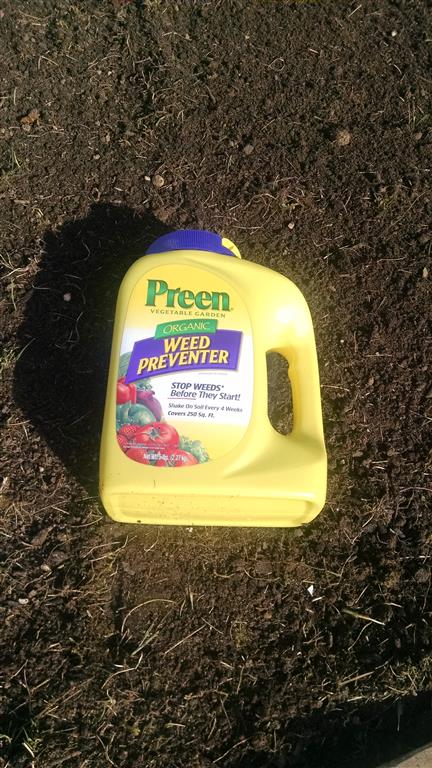
I created a row garden this year with a wide array of veggies, including tomatoes, cucumbers, onions, collard greens, kale, spinach and potatoes. I’ve made the commitment to grow organic, but it can be difficult to maintain a large row garden like mine with all the weeds growing so fast. I looked for an organic weed preventer and I found a product called Preen Organic Vegetable Garden Weed Preventer. I decided to sow it into the soil before planting seeds (it’s also serves a fertilizer).

Preen Organic Vegetable Garden Weed Preventer

Benefits
• it’s affordable at around $15 for a 5 lb container that covers 250 sq ft
• it’s advertised to prevent weeds from growing in the garden and fertilize the soil
• it’s easy to use, no mixing required — just sprinkle and sow it into the dirt
• 1 application is supposed to last for up to 3 months
• can be applied to the soil in the summer, spring and fall

I didn’t see weeds starting to make their appearance in my garden until about a month after using the Preen Organic Vegetable Garden Weed Preventer. So while it worked for a while, it didn’t last in my garden for the 3 months as advertised. However, I might give it another application soon to help keep weeds at bay for another month.

I’d give this product a rating of 3 stars out of 5.

Growing a garden is truly a labor of love. To harvest and eat vegetables that I know grow free of chemicals +\or pesticides is an awesome feeling. However, if you can, you should cut out unnecessary chores whenever possible. I recommend Preen Organic Vegetable Garden Weed Preventer to organic gardeners who need something to help keep their weeds at bay.


Posted by Jade

Share this:

  • Click to share on X (Opens in new window) X
  • Click to share on Facebook (Opens in new window) Facebook
  • Click to share on Pinterest (Opens in new window) Pinterest
  • Click to share on Tumblr (Opens in new window) Tumblr
  • Click to share on LinkedIn (Opens in new window) LinkedIn
  • Click to email a link to a friend (Opens in new window) Email
  • Click to print (Opens in new window) Print
  • More
  • Click to share on Reddit (Opens in new window) Reddit
  • Click to share on Pocket (Opens in new window) Pocket

Filed Under: Things That Make Life Easier, Yard Work & Gardening Tagged With: gardening reviews, organic garden, organic gardening, preen weed preventer, product reviews, reviews, weed prevention

  • Page 1
  • Page 2
  • Page 3
  • Go to Next Page »

Primary Sidebar

Categories

  • Beauty Tips
  • Cat Central
  • Dating, Love and Relationships
  • Food & Recipes
  • Health and Wellness
  • Home Buying or Renting
  • Home Care and Cleaning
  • Home Decor and Design
  • Home Equipment and Appliances
  • Home Finance and Budgeting
  • Home Improvement
  • Home Tips
  • Life Thoughts by Jas
  • Light Simple
  • Motivation and Self Help
  • Parenting Advice & Tips
  • Parties, Events, Holidays, Fun
  • Pest Control
  • Pets
  • Product Reviews
  • Quick Tips
  • Quotes
  • Shopping Advice
  • Special Deals
  • Summer Products
  • The Funnies
  • Things That Make Life Easier
  • Uncategorized
  • Yard Work & Gardening

Copyright © 2025 · Genesis Sample on Genesis Framework · WordPress · Log in