• Skip to primary navigation
  • Skip to main content
  • Skip to primary sidebar
  • Home
  • Posts
    • Home Care and Cleaning
    • Home Decor and Design
    • Yard Work & Gardening
    • Food & Recipes
    • Pets
    • Health and Wellness
    • Motivation and Self Help
    • Home Tips
    • Parenting Advice & Tips
    • Parties, Events, Holidays, Fun
    • Things That Make Life Easier
    • Home Finance and Budgeting
    • Shopping Advice
  • Cat Central
  • Share a Home Tip
  • Got a Question?

Loving Our Home | Home Tips, Advice, and Easy Recipes

Simple Home Tips and Solutions

How to Protect Food from Insects at Outdoor Barbecues and Picnics

June 13, 2015 By LovingOurHome.com Leave a Comment

The more warm and sunny it gets outside, the more you, your family and friends are going to get excited about firing up the grill and barbecuing up a storm. But as exciting as it sounds in theory, bringing food outside can be a challenge due to the wide variety of bugs and flying insects that also want to party with you and have some of your delicious food. Here are some simple ideas for how to protect your food (and guests) from annoying insects.

Table Tent for Flies

As soon as the food hits the table outside, you’re probably going to have to start contending with flies who want to try some. Flies are mostly harmless, but they are very unsanitary insects—they sit and feed on feces, dirt and dead carcasses—so you don’t want them near your food. The best way to shield your food from flies is to get a couple of Pop-Up Mesh Screen Food Cover Tents. They’re made of a light mesh material that the average fly can’t penetrate and are super affordable (2 for about $10). Flies might still fly around the area, but you won’t have to worry about them sitting on your fried chicken and potato salad.Barbecue Outdoor Grilling

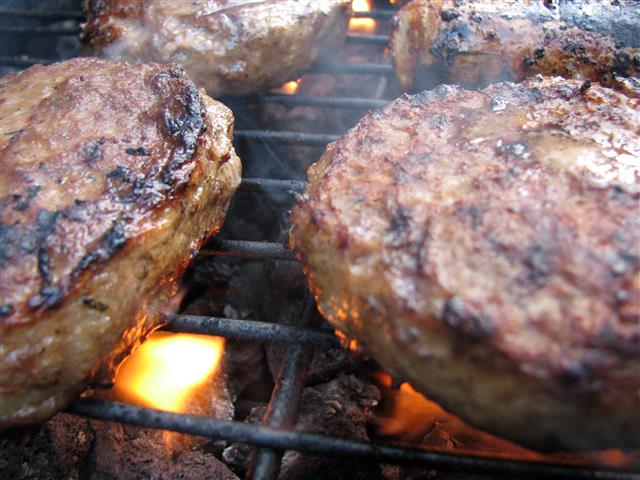
Citronella Candles for Mosquitoes

There’s another type of fly that come to your barbecue to “feed” but not on the chicken. Mosquitoes are looking to make a meal out of your guests. One of the best ways to keep mosquitoes and other flying insects out of the area is to surround your guests with citronella candles. Citronella is a very fragrant oil that is extracted from a plant that mosquitoes don’t like. There are a number of styles of citronella candles that you can buy that will make your party look and smell great while protecting you from mosquito bites. It’s also a good idea to keep a mosquito repellent spray handy for your guests.

Keeping Ants Away

If you’re planning on having a picnic or barbecue in the park, ants are going to be competing for your lunch. If you want to keep ants away from your picnic here are a few ideas:

  • Create a mixture of borax and regular sugar to sprinkle around the perimeter of your picnic of barbecue area. The ants will be attracted to the smell of sugar before they even have a chance to reach your table. The borax gets rid of ant colonies.
  • If you just want to keep the ants away, draw a line around your picnic area with a big piece of sidewalk chalk or sprinkle flour. They will be repelled by either substance.
  • If your foot is on top of a picnic table, put all four legs in a bucket of water. Ants can’t cross water.

Wasp or Yellowjacket Trap

One of the most annoying parts of eating and grilling outside is dodging wasps, hornets and similar flying insects who think they are invited to your party! One way to manage this problem is to set a wasp and yellowjacket trap a short distance from the area where you’re gathering. The wasps go there instead of your picnic area—once they enter the bag they can’t get out. Make sure you get a wasp trap that doesn’t attract beneficial honeybees. There are also similarly designed outdoor fly traps if you don’t want them bothering you while you eat.

Bee Repellent Sprays

For the most part, bees are our friends. They pollinate our plants and give us delicious honey. But they aren’t always welcome at outdoor barbecues and picnics. Experts say that the best way to repel bees is to spray the area with a bee repellent spray. Citronella candles are also helpful in keeping them at bay.

When you’re grilling this spring and summer, use these simple tips to protect your food from annoying insects who don’t want to leave you and your guests alone. Once you eliminate this problem, you can relax knowing that everyone is having a relaxed and enjoyable time eating outdoors.

Share this:

  • Click to share on X (Opens in new window) X
  • Click to share on Facebook (Opens in new window) Facebook
  • Click to share on Pinterest (Opens in new window) Pinterest
  • Click to share on Tumblr (Opens in new window) Tumblr
  • Click to share on LinkedIn (Opens in new window) LinkedIn
  • Click to email a link to a friend (Opens in new window) Email
  • Click to print (Opens in new window) Print
  • More
  • Click to share on Reddit (Opens in new window) Reddit
  • Click to share on Pocket (Opens in new window) Pocket

Filed Under: Home Tips, Parties, Events, Holidays, Fun, Pest Control, Things That Make Life Easier Tagged With: barbecues, outdoor fun, pest control, picnics, repelling insects

Stuffed Green Peppers Recipe

May 29, 2015 By LovingOurHome.com Leave a Comment

As a child, I was never a big fan of green peppers. Now as an adult, my taste buds have “come alive” and I’m open to new things. This recipe for Stuffed Green Peppers was conceived out of the boredom of traditional recipes that I have been consuming for years. Never did I expect my stuffed peppers to have such a heavenly and mouth watering taste! It’s great on its own since you have a few of the key food groups stuffed into one delicious entree.

Green Peppers Ready to Be Stuffed

Keep in mind that you can replace the ground beef in this recipe with ground turkey or chicken for a healthier choice. For added flavor you can also put Italian sausage into the mixture. Don’t worry — any leftovers of the mixture can be frozen for future use. This recipe will feed four adults, very well.

Ingredients

  • 4 Large Whole Green Peppers
  • 1lb Lean Ground Beef
  • 1 8oz Can Tomato Sauce
  • 1 Cup Cooked Brown Rice (white or wild rice can be used as well)
  • 2-3 Cloves Finely Chopped Garlic
  • 1 Medium Onion Finely Diced
  • 1 Teaspoon Salt
  • 1 Tablespoon Onion Powder
  • 1 Tablespoon Oregano

Directions
Cut off the tops of your greens peppers about 1/4 inch down from the top to create a bowl and a lid. Carefully, remove the seeds and the rib from the inside. Be careful not to tear your peppers. Place the peppers aside. Preheat oven to 350.

Now in a large skillet on medium heat, brown ground beef and drain excess oil. Place heat on medium low and add chopped onions, oregano, salt and onion powder. Cover with lid and allow to cook until onions become translucent (approximately 3-4 minutes). Next add your chopped garlic and combine well with the mixture. Now add your cooked rice and tomato sauce and mix well. Taste mixture to ensure no added salt is needed. If so, add a little at a time. Remove from heat.

Now, get a large casserole dish. Begin filling your peppers with the mixture and fill to the top. Place the lid back onto the pepper and place in dish. Pour 1/4 cup of water in the bottom of the dish. This will help ensure that the bottom of your peppers will not burn. Place dish in oven on the middle rack and allow to bake for 25 minutes until done.

* Sprinkle some shredded mozzarella cheese on top of your stuffed green peppers to make it a true Italian meal!


Posted by Eve


Images: Flickr/jeffreyww & Flickr/nate 

Share this:

  • Click to share on X (Opens in new window) X
  • Click to share on Facebook (Opens in new window) Facebook
  • Click to share on Pinterest (Opens in new window) Pinterest
  • Click to share on Tumblr (Opens in new window) Tumblr
  • Click to share on LinkedIn (Opens in new window) LinkedIn
  • Click to email a link to a friend (Opens in new window) Email
  • Click to print (Opens in new window) Print
  • More
  • Click to share on Reddit (Opens in new window) Reddit
  • Click to share on Pocket (Opens in new window) Pocket

Filed Under: Food & Recipes Tagged With: evelyns recipes, food, recipes, stuffed green peppers, stuffed peppers

Boston Butt Pork With Homemade Gravy

May 16, 2015 By LovingOurHome.com Leave a Comment

This recipe for Boston Butt Pork With Homemade Gravy is rather simple to make and tastes delicious. All that you need is a few key ingredients to make a home made meal that you, your guests and your family will enjoy. They will think that your spent hours in the kitchen when it’s more like a half an hour. You can also replace the pork with beef or chicken in this recipe if you wish. This will feed three people very well.

Ingredients
1-2 Pounds of Boston Butt ( cut into bite size pieces )
Boston Butt Pork with Homemade Gravy3 Tablespoons Extra Virgin Olive Oil
3 Cloves of Fresh Garlic ( finely chopped )
1-2 Teaspoons of Salt
4 Tablespoons Flour
2-3 Teaspoons Onion Powder
1 Small Red Onion ( diced )
1 Small White Onion ( diced )
1-2 Tablespoons Rosemary
1/2 Large Green Pepper ( diced )

Gravy Mixture Ingredients
1-2 Tablespoons Flour
1/2 Chicken Bouillon ( beef OK )
1 Cup Warm Water

Instructions
In a large sauce pan add olive oil and place on medium high heat.
Add onions and green peppers to sauce pan
season with:

1 Tablespoon Rosemary
1 Teaspoon Salt
3 Cloves Finely Chopped Garlic (add last, to make sure garlic doesn’t burn)
Sautée until tender
Remove onions and green peppers and set aside
Season pork with remaining spices and coat meat with 2 Tablespoons of flour
Add: 2 Tablespoons of Olive Oil to sauce pan on medium high heat and allow oil to heat up for 1-2 minutes
Add: seasoned and floured meat to pan (spread out evenly in sauce pan)
Cook meat for 2-3 minutes on each side until browned
Return sautéed onions and green peppers to pan
Allow to cook on medium heat for 2-3 minutes ( to allow flavors to blend )

While flavors are combining make gravy mixture. In a large bowl add:
1 Cup of hot water
1/2 bouillon cube
2 Tablespoons Flour

Whisk until bouillon is disintegrated and combines with flour
Now, reduce heat to low and pour mix over meat and peppers
Mix gently until gravy thickens ( if too thick, add a little water slowly to thin out gravy )
Serve this over rice with a side salad.

Enjoy!!!!

Posted by Eve

Share this:

  • Click to share on X (Opens in new window) X
  • Click to share on Facebook (Opens in new window) Facebook
  • Click to share on Pinterest (Opens in new window) Pinterest
  • Click to share on Tumblr (Opens in new window) Tumblr
  • Click to share on LinkedIn (Opens in new window) LinkedIn
  • Click to email a link to a friend (Opens in new window) Email
  • Click to print (Opens in new window) Print
  • More
  • Click to share on Reddit (Opens in new window) Reddit
  • Click to share on Pocket (Opens in new window) Pocket

Filed Under: Food & Recipes Tagged With: boston butt, butt pork, cooking, food, homemade gravy, homemade stew, lorraines recipes, pork recipes, recipes

4 Must-Have Natural Beauty Products to Keep in Your Bathroom

May 11, 2015 By LovingOurHome.com Leave a Comment

There are countless creams on the market that are very expensive and claim to be beneficial to your skin. But the irony is that some of them are full of chemicals and additives that can be harmful to your skin in the long run. There are a few must have natural beauty products that you should definitely have in your bathroom and use on a daily basis. Here they are:

1. Witch Hazel

Witch Hazel Witch hazel is an excellent face cleanser because it is a natural astringent with anti-inflammatory properties.  Not only does it leave your skin clean but it also helps to minimize the size of your pores.

2. Cocoa Butter

51MfVGGKO-LCocoa butter is popular with women because it has been known to reduce the appearance of stretch marks–particularly when managing a growing pregnant belly. It is also useful for softening the skin and reducing the appearance of scars or dark marks if you use it regularly for an extended period of time.

3. Coconut Oil

Coconut Oil

Coconut oil is great to use on your entire body. After a shower, rehydrate your skin by applying a thin coat of it everywhere. Coconut oil can be also be combined with baking soda to brush your teeth!  If you have frizzy hair, apply some to your hair to lessen the frizz and the scalp to promote growth.

4. Shea Butter

Shea Butter


Shea butter is a vitamin A enriched skin and face cream that is derived from the seeds of the Shea (karite) tree. In its natural state, it looks like a yellow block of butter, but when you put some in the palm of your hand it melts right down. It can be used for sunburns, rough/dry patches on your elbows, cracked dry feet and insect bites. Rash symptoms and eczema can often be relieved with the regular use of natural shea butter — just put it on before you go to bed. Shea butter is also a natural sunscreen that African people use each day to keep their skin rich, beautiful, young-looking and protected.

If you want healthy skin, just keep these must-have natural beauty products on your bathroom counter. There is no reason to break the bank to have beautiful skin. You may find that some of your favorite commercial products contain these natural substances as the main ingredient, so why not go straight to the source!

Posted by Eve


Image Courtesy Flickr; lobsterstew

Share this:

  • Click to share on X (Opens in new window) X
  • Click to share on Facebook (Opens in new window) Facebook
  • Click to share on Pinterest (Opens in new window) Pinterest
  • Click to share on Tumblr (Opens in new window) Tumblr
  • Click to share on LinkedIn (Opens in new window) LinkedIn
  • Click to email a link to a friend (Opens in new window) Email
  • Click to print (Opens in new window) Print
  • More
  • Click to share on Reddit (Opens in new window) Reddit
  • Click to share on Pocket (Opens in new window) Pocket

Filed Under: Health and Wellness, Shopping Advice Tagged With: beautiful skin, cocoa butter, coconut oil, healthy skin, natural beauty products, natural skin care, natural skin products, shea butter, witch hazel

Flower Gardening Tips

May 11, 2015 By LovingOurHome.com Leave a Comment

Flowers, whether indoors or out, definitely add a great ambiance to your home.  There are a vast variety of flowers to choose from for your flower garden. Here are a few key considerations to keep in mind before you begin flower gardening this year.

Annuals or Perennials?

First, decide whether you want to plant perennials or annuals. Perennials are flowers that will bloom for you every year and annuals bloom only once (you have to replant them every spring). So if you want to see the same flowers every year definitely plant perennials. If you are a person who enjoys change, you should choose annuals. Switch things up every year and try something new.

The Birds, Bees and Butterflies

Next, decide on the atmosphere that you’re trying to create with your flower garden. Certain flowers attract a variety of different birds and insect. For example, if you enjoy the sight of butterflies and hummingbirds, grow flowers that produce nectar and flowers that are pollen-rich, like asters, fuschias and morning glory varieties. These types of flowers (nectar rich) can be found in both annuals and perennials. Keep in also that they will attract honeybees.

All the Colors of Nature

Calla LiliesLastly, decide on the color scheme for your flower garden. Focus on colors that will brighten your mood and make your backyard or patio look delightful, like reds, yellows, whites, purples and oranges. If you like pastel colors like lilac and light blue, then create a pastel flower patch that blooms in just those colors (try pansies, roses and calla lilies). If you happen to be a person who likes bold and dark colors, like deep reds, browns and black, then choose flowers that fit that color scheme (orchids, dahlias, irises and deep maroon sunflowers).

A Few Other Tips

Flower gardens are a beautiful accent to any home, whether they’re indoors, on a patio or lining your backyard. There is no “true” guide to follow — you have to follow your own inspiration. Do a little research and find out what flowers do best in your particular climate region to ensure that they will bloom fully and stay fresh and beautiful for as long as possible. Peep in on your neighbors and ask them questions to get ideas for flowers to grow.

Most of all have fun. Flower gardening should not be a chore — it should be a delight; something to look forward to each day.

Posted by Eve


(Image courtesy Flickr; malikdhadha)

Share this:

  • Click to share on X (Opens in new window) X
  • Click to share on Facebook (Opens in new window) Facebook
  • Click to share on Pinterest (Opens in new window) Pinterest
  • Click to share on Tumblr (Opens in new window) Tumblr
  • Click to share on LinkedIn (Opens in new window) LinkedIn
  • Click to email a link to a friend (Opens in new window) Email
  • Click to print (Opens in new window) Print
  • More
  • Click to share on Reddit (Opens in new window) Reddit
  • Click to share on Pocket (Opens in new window) Pocket

Filed Under: Yard Work & Gardening Tagged With: calla lily, flower books, flower garden, flower gardening, flower tips, gardening tips, growing flowers

Indoor Vegetable Gardening Tips

May 11, 2015 By LovingOurHome.com 16 Comments

Growing your own food is now more popular than ever before. Unfortunately, not everyone has the outdoor gardening space to do so. If this is your dilemma, transform an area inside of your home to grow some of your very own vegetables for family meals! And you don’t really have to spend a lot of money to do so. A one-time investment of about $75 will continue to bring you benefits well into the future, and you might even inspire your family and friends to do the same in their homes.

What to Grow…

When growing indoors, you have to choose crops that won’t overwhelm your space. Some good choices are collard greens, spinach, peppers, carrots, potatoes, beans, peas, radishes, strawberries, and herbs (cilantro, oregano, basil, rosemary, etc). Try to choose foods that you buy

Heirloom Spinach Seeds

and eat on a regular basis. It’s important that you plant heirloom seeds — they are handed down generation after generation and grow successfully without much human intervention. You can get a small pack of seeds for about $25 here.

A note about seeds: A lot of foods are now being manufactured with genetically modified organisms or GMO.  Genes from the DNA are extracted and artificially forced into the genes of unrelated plants to make them resistant to bugs and disease. It also makes veggies grow faster, to yield more food for the farmer. Avoid foods produced in this manner as they haven’t been proven 100% good for humans. Starting an indoor organic home garden can be your first step to eliminating GMO foods from your diet.

Preparing the Area

The most important part of growing a vegetable garden indoors is choosing the best location. Your vegetable garden needs as much direct sunlight as it can get, so pick a window sill that gets plenty of sun. Ideally, you want the sun to shine on your indoor garden for at least six to eight hours every day. Clear the area and decorate it with an assortment of planters of different sizes (you can find some at your local dollar store). Place them on racks to elevate them in front of your window or use hanging baskets. Your investment here will be about $10-$20 depending on how many veggies you want to plant.

If you have a dearth of sunlight to your home or apartment, there are also affordable grow lights that can be found on the Internet. They keep your soil warm. Just take note that they will increase your electric bill, so use the sun whenever possible.

Good Soil - Nature's Care
Good Soil – Nature’s Care

Your Soil

The next point that you’ll have to address if you want to grow vegetables inside your home is the quality of the soil. For an indoor vegetable garden, invest in really good soil to ensure that your plants get as much food and nourishment as possible. Get a bag of top soil and mix it in with a quality (preferably organic) soil that’s made with plant food like this one. Expect to pay about $15 or more total for soil. You will be happy you invested in the good stuff when you start to see the results.

Planting the Seeds

When the soil is in place, start poking holes in your soil for planting your veggies. Don’t spend too much time worrying about the seeds being perfectly placed — the general rule of thumb for larger seeds is to add about two or three seeds per hole. Each seed pack has instructions for how far apart to plant each seed, because many varieties need room to grow. For smaller seeds, like carrots, poke plenty of holes in the dirt and sprinkle them fairly liberally. Another rule of thumb is that the depth to plant the seed should be about 3 times its diameter.

Quick tip: Keep the same type of plant in each planter; for example, don’t plant strawberries with potatoes.

Water and Watch it Grow

Parsley Seeds Growing

Once you have your seeds in place, it’s mostly a waiting game. Get a watering can and keep it right near your indoor vegetable garden. Water your planters daily at around 9 or 10 am each morning. The germination time for each type of seed varies, but you’ll generally start to see some sprouts after about 7-10 days. The time to ripe vegetables generally takes two or more months.

Growing your own indoor garden is going to save you a lot on grocery bills on a monthly basis, and it only requires a little bit of money, effort and planning. You will especially feel a sense of pride when you eat the items that you have grown from seeds. An added bonus is that tending to your garden daily can also become a stress reliever.

Happy Growing!


Posted by Eve

Share this:

  • Click to share on X (Opens in new window) X
  • Click to share on Facebook (Opens in new window) Facebook
  • Click to share on Pinterest (Opens in new window) Pinterest
  • Click to share on Tumblr (Opens in new window) Tumblr
  • Click to share on LinkedIn (Opens in new window) LinkedIn
  • Click to email a link to a friend (Opens in new window) Email
  • Click to print (Opens in new window) Print
  • More
  • Click to share on Reddit (Opens in new window) Reddit
  • Click to share on Pocket (Opens in new window) Pocket

Filed Under: Yard Work & Gardening Tagged With: gardening tips, growing veggies, indoor gardening, vegetable garding

  • « Go to Previous Page
  • Page 1
  • Interim pages omitted …
  • Page 21
  • Page 22
  • Page 23
  • Page 24
  • Page 25
  • Interim pages omitted …
  • Page 51
  • Go to Next Page »

Primary Sidebar

Categories

  • Beauty Tips
  • Cat Central
  • Dating, Love and Relationships
  • Food & Recipes
  • Health and Wellness
  • Home Buying or Renting
  • Home Care and Cleaning
  • Home Decor and Design
  • Home Equipment and Appliances
  • Home Finance and Budgeting
  • Home Improvement
  • Home Tips
  • Life Thoughts by Jas
  • Light Simple
  • Motivation and Self Help
  • Parenting Advice & Tips
  • Parties, Events, Holidays, Fun
  • Pest Control
  • Pets
  • Product Reviews
  • Quick Tips
  • Quotes
  • Shopping Advice
  • Special Deals
  • Summer Products
  • The Funnies
  • Things That Make Life Easier
  • Uncategorized
  • Yard Work & Gardening

Copyright © 2025 · Genesis Sample on Genesis Framework · WordPress · Log in