• Skip to primary navigation
  • Skip to main content
  • Skip to primary sidebar
  • Home
  • Posts
    • Home Care and Cleaning
    • Home Decor and Design
    • Yard Work & Gardening
    • Food & Recipes
    • Pets
    • Health and Wellness
    • Motivation and Self Help
    • Home Tips
    • Parenting Advice & Tips
    • Parties, Events, Holidays, Fun
    • Things That Make Life Easier
    • Home Finance and Budgeting
    • Shopping Advice
  • Cat Central
  • Share a Home Tip
  • Got a Question?

Loving Our Home | Home Tips, Advice, and Easy Recipes

Simple Home Tips and Solutions

Organic Raised Garden Box: How I Did It

July 8, 2019 By LovingOurHome.com Leave a Comment

How I made a 3 x 5 foot garden box so that I could grow a small raised organic garden.

I’ve been envisioning this project for some time now, and finally put things into motion last month. The soil on my property isn’t the best, and I’ve sprayed it with Ground Clear on several occasions in the past, so I knew that if I decided to start a garden it would have to be in a raised box with new, fresh soil added in. I decided to fill the box with half regular soil, half organic soil to keep the cost reasonable. I would say this entire project cost me about $125. Before I get into my steps, this is what it looks like now:

Raised Garden Box

These are the steps I took to create my organic raised garden box.

Step 1: Drawing Up the Plans

The first step of creating a raised garden box is determining how large and deep you want it to be. I decided on 3 x 5 feet, with a depth of about 2 feet. The depth you choose will depend on the types of vegetables you want to grow — some, like tomatoes, require about 18 inches, while others only need about six inches for proper root growth.

Step 2: Shopping for Wood and Supplies

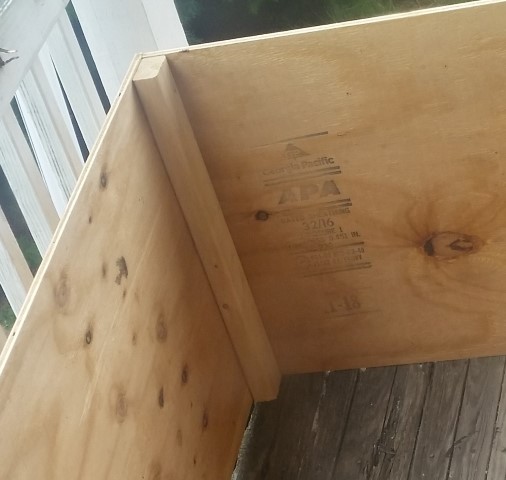
I got help on this step from the guy at my local hardware store. I found a large plank of plywood that cost about $19. It was sized just right so that I could have it cut to two (2) five foot pieces, and two (2) three foot pieces. Note: from what I’ve learned, it’s fine and probably preferable to choose pre-treated wood for an organic garden — it helps avoid rot and the potential effects of insects. I used my own organic treatment mixture to help protect the wood (lemon, vinegar, water, peppermint spray) but I think the pre-treated wood is fine. After cutting the plank into four pieces, the guy in the hardware store recommended anchoring them with 2 x 4 posts at the corners with screws (see the photo below for clarity). He cut the large 2 x 4 post into 4 equal posts. I also purchased a box of outdoor screws.
Step 3: Assembling the Raised Garden Box

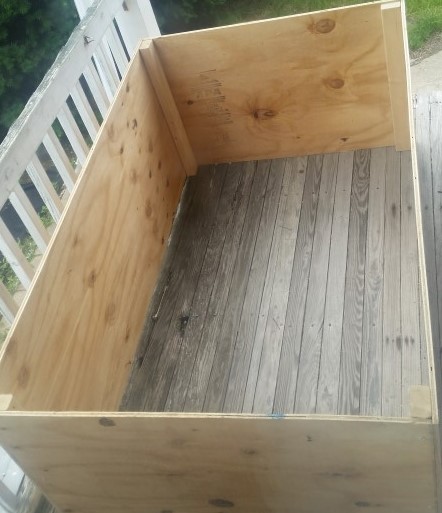
Keep in mind that you need to keep the bottom of your garden box open so that water can filtrate into the ground. So you only need to assemble the sides. I used a drill to place three screws at each corner/side, with the 2 foot post on the inside corner as the anchor. Again, it sounds complicated, but not really — just look at the photo. When assembled it looked like this:
Step 4: Choosing a Location for Your Raised Organic Garden Box

Choose a place for your box that will get at least four hours of direct sunlight each day for the best results. I placed the box down, then traced an outline of it with my shovel. I then removed the box again and dug about two inches down inside the rectangle. This was to ensure that the box would stay in place. I then put the box back inside the rectangle and used the excess soil to shore it up around the sides. I also laid excess treated wood at the bottom of the box to help minimize the chance of anything being about to dig under the soil.

Step 5: Fill Your Organic Raised Garden Box with Soil

As you probably know, organic soil isn’t cheap. It costs about $8-$10 per 1.5 cubic foot bag. I decided to fill the box with about 20 cubic feet of soil and used a mix of top soil (at the bottom; about $1.25 per 1.5 cu feet) and organic soil (at the top). I probably spent about $75. I used a mix of these two organic soils:

Step 6: Plant Your Seeds

When you’ve finally done all of this work, planting your seeds will be the fun part. I planted a few cucumber and tomato seeds in a separate bucket will doing all the other steps so that they’d have a head start.

Step 7: Water and Tend to Your Garden

After you’ve finished setting up your raised organic garden box and planting your seeds, the next step is to set up automatic watering, surround it with rabbit fencing if needed, and tend to your plants.

Enjoy!

Share this:

  • Click to share on X (Opens in new window) X
  • Click to share on Facebook (Opens in new window) Facebook
  • Click to share on Pinterest (Opens in new window) Pinterest
  • Click to share on Tumblr (Opens in new window) Tumblr
  • Click to share on LinkedIn (Opens in new window) LinkedIn
  • Click to email a link to a friend (Opens in new window) Email
  • Click to print (Opens in new window) Print
  • More
  • Click to share on Reddit (Opens in new window) Reddit
  • Click to share on Pocket (Opens in new window) Pocket

Filed Under: Yard Work & Gardening Tagged With: gardening tips, organic garden

US Women’s Soccer Team Makes History Again – Winning, Inspiring Young Women and Girls

July 8, 2019 By LovingOurHome.com Leave a Comment

Megan Rapinoe, Alex Morgan, Crystal Dunn, Ali Krieger and team fall on the right side of history while winning the 2019 World Cup in women’s soccer.

It’s been a while since I watched any sports game with as much enthusiasm as I watched the 2019 Women’s World Cup final game on Sunday, July 7, 2019. It was one of the most thrilling games I’ve seen in a long time.

Megan Rapinoe recently made news for her public, political stands on issues of social justice. Her teammate Alex Morgan backed her up (as teammates should). Then they all went out on the field on Sunday and backed up their words with action. They won the game against the Netherlands 2-0, snatching the World Cup for the fourth time (second time in a row). And let’s be clear — the Netherlands had a great defensive squad, including one of the top goal keepers in the league.

Inspiring Young Girls

I’m not the sports buff I used to be, but I know how inspiring it can be to see someone who looks like an older version of you winning, working hard, and doing the right thing. I know that the impact of this women’s soccer game and all the politics that surround it will likely be far reaching.

One of the issues currently being argued after their win is fair/equal pay for women sports players. All sorts of justifications have been made for why the men’s soccer team still makes more than the World Champion women’s soccer team. But those excuses are finally starting to fall by the wayside. Not only does the women’s team bring in more revenue, they also have the top selling gear (jerseys, t-shirts, etc) and consistent viewership. On what planet do you work harder, produce better results, but get paid less?

Personally, I’m proud of the USWNT Women’s Soccer Team, not just for being great athletes and winning the World Cup, but also for being a group that stands up for what they believe in. They are the types of roles models I think we need for young girls to help them achieve great things as adults.

Posted by Jade

Share this:

  • Click to share on X (Opens in new window) X
  • Click to share on Facebook (Opens in new window) Facebook
  • Click to share on Pinterest (Opens in new window) Pinterest
  • Click to share on Tumblr (Opens in new window) Tumblr
  • Click to share on LinkedIn (Opens in new window) LinkedIn
  • Click to email a link to a friend (Opens in new window) Email
  • Click to print (Opens in new window) Print
  • More
  • Click to share on Reddit (Opens in new window) Reddit
  • Click to share on Pocket (Opens in new window) Pocket

Filed Under: Parenting Advice & Tips, Parties, Events, Holidays, Fun Tagged With: alex morgan, uswnt

When a Cat Can’t Pee: My Experience with Urinary Blockage in a Beloved Cat

May 27, 2018 By LovingOurHome.com Leave a Comment

My stressful and unfortunate experience trying to save my beloved male cat who had a urinary blockage.


I guess I’m writing this post for four main reasons:
  • To comfort anyone who’s going through a similar issue with a beloved pet, and maybe help you make a difficult decision without exhausting your resources.
  • To warn pet owners about the tactics of vets who stay in business by taking advantage of pet owners who are in a vulnerable position (guilt tactics).
  • Because I need to tell someone (still grieving).
  • To pay homage to one of the most well behaved and loving cats I’ve ever known.
I first met Angelo when he was just a couple of weeks old. I kept hearing this tiny mewing sound, but I thought it was my imagination or my television program at first. I kept muting the TV to isolate the sound, until I finally went outside to see where it was coming from.


There was this tiny black fluffy cat with its head sticking out of a pipe, crying out for help. When I tried to pull him out, he gave a small hiss, that instinctual thing that even baby cats have. Finally I was able to pry the pipe open with tools and release him. He stumbled and his mom, who was waiting nearby, quickly scooped him up and carried him away.


Months later we saw him, now a toddler cat, walking around the backyard scavenging for food with his sisters. Someone gave him a piece of food, which happened to be Italian. She named him Angelo, and we decided to adopt him since he was so friendly. I ultimately ended up being responsible for his care.
Though a little skittish at times, he warmed up to our family. He was very strong and rambunctious, playing with the other cats in the house. He fit right in with them from the start. He also went to the window often to see his mother outside. He was very peaceful and pensive. He loved to lay by me and watch my laptop screen as I worked. He’s the only cat who I’ve ever seen watch television programs as if he knew what was going on.


Four Years Old
One day I noticed that Angelo (about four years old at the time) was spending an inordinate amount of time sitting in the litter box. After 24 hours, I realized that this was a recurring thing. He would release a few drops of liquid, but not enough to empty his bladder.


I looked up this issue online, and “urinary blockage in male cats” is what came up time and time again. They said it could be related to a sudden diet change. I had been giving him Petsmart’s Good Natured grain-free dry food for years without a problem, then they suddenly decided to discontinue it without warning customers (great idea Petsmart, thanks). So about a month before Angelo started to have litter box issues, I bought a different food called Simply Nourish grain-free. I don’t know for sure if this food was the cause of his blockage, but I immediately stopped feeding it to all of my cats when he started having problems and gave them Rachael Ray’s Nutrish grain free instead.


A couple of days after I started doing research into the problem, he threw up his entire lunch, and that prompted me to take him to the vet. The first vet I found was very urgent, telling me that he had a blockage and needed a catheterization, which is a procedure where a tube is inserted into the urethra to clear the tiny crystals and blood from the bladder manually. They give the cat fluids at the same time to flush out the bladder. The first quote they gave me was about $1,700.


I am a working class single person. I probably don’t spend that kind of money on groceries for an entire year. When I stressed my financial constraints, they told me that they could set something up where he would be catheterized for a few hours and I would take him home the same day with fluids for about $500. That wasn’t including the cost of the exam and medications. Doing fluids at home after such a short catheterization period is pretty risky–there’s a high risk that the cat will reblock again and you would have just lost $500, just like that. You’re better off tossing five $100 bills in the wind. Ideally the cat should have the catheter in for at least 24-48 hours.


I ended up spending about $100 at the first vet, just so that they could tell me what I had already researched online. They seemed to be pressing me too much, so I decided to look at other vets and see if I could get a better treatment plan at a reasonable price. I found one that had relatively good reviews that had been deemed an “affordable vet,” if there is such a thing. They told me a similar story, except they would keep my Angelo overnight with fluids and observe him for about $600. This didn’t include tests and X-rays. I took a minute to count up my coins, money that I really needed to take care of other financial needs, and took a chance.


After a two-night stay (I paid an additional $100 for the extra night — current vet bill total $800) I took Angelo home. They said his urine was running clear again. He was urinating here and there at home, and I was watching him like a hawk. After several visits to the litter box in a 30 minute span he had emptied his bladder and was comfortable. I bought him an expensive dust-free litter (Arm & Hammer Clump and Seal) and fed him mostly wet food (grain-free) and was ecstatic when he released a lot of urine on a cat bed.


“Pee anywhere you want baby, I don’t care,” I told him, and sincerely meant it at that point. Anything to keep his bladder empty.


It went on like this for over a month, and with each urination I felt more relaxed thinking that he was out of the woods. I was constantly stressed while at work and lost about 10 pounds due to lack of appetite. The last thing I wanted to do what sit at my desk for hours while thinking about whether he was going to the bathroom at home.


I remember one time I heard him streaming urine and jumped for joy. This was the kind of thing that made me happy each day.


But then one day he started spending too much time in the box again. Then I saw a huge glob of throw up next to the litter. I frantically took him back to the last vet that had treated him.


This time, I dealt with a different vet who I didn’t particularly feel comfortable with. He gave me cost-efficient options that the other vet did not, including taking him home with fluid therapy. I would have to insert a needle under his skin myself and monitor him. He also didn’t think that the medications I was prescribed before, Prazosin to relax the0 urethra, and Prednisone for pain, were necessary.


I wonder if that could have made all the difference, to just have my cat on the Prazosin continuously. Much like regular doctors, vets don’t always know it all. I also wonder if I should have put him on the expensive prescription wet food they recommended (Royal Canin SO), which cost about $3 per can. Instead I gave him Wellness grain-free wet food. He seemed fine on that for a while.


I decided to pay the money to have my cat stay over again for at least one night and be catheterized. The additional cost was $500. I spent at least 15 minutes going over the bill with them to see what I could afford. They called me the next day and said he was doing fine but they really wanted to keep him at least another day (another $100+ — current vet bill total ~$1400). I agreed reluctantly after I was approved for a small CareOne Credit line. I agreed to the additional night, feeling confident that he would be alright.


Assuming Makes an.. Well You Know the Rest
The next day around the afternoon they said his pee was running clear and he was doing well. After work I was all set to go home and pick him up early in the morning when I received a phone call from the vet. He had blocked again. I was devastated–I should have known better than to assume anything too early. He told me that I had to decide what to do within 2 hours.


The late night vet was very short with me and I didn’t feel comfortable with her. She wanted me to come there and have him euthanized. Nice way to show compassion while you’re basically telling someone that they are going to lose their pet after spending $1,400. Still out of desperation I asked her to try another catheterization procedure. It would cost another $200+.


The rude late night vet called about an hour later and told me she tried but wasn’t able to do it. I wouldn’t be surprised if she didn’t even bother to give him anesthesia first, I should have just picked him up that night. The next morning the original vet who had treated Angelo called me and told me that she could try the procedure again but it would cost me yet another $200 just to try and another night’s stay in the hospital.


I was in disbelief. They had charged me the $200 for a catheterization procedure even though they weren’t successful. The vet who originally treated Angelo, who I had trusted to a degree, refused to relent on any of the charges saying “I have my salary and you have yours.” I had no choice at that point but to pick up my cat. These people would have taken all of my money if they could have.


When I went to pick Angelo up, the doctor didn’t even have the decency to come out to meet me to speak to me about what had gone on. I had to deal with veterinary assistants who weren’t that familiar with the case. At that point, I was pretty much done and just took my cat home. I paid an extra $15 on prescription Royal Canin foods, hoping that might work. I was told that the vet would call me later that day, but I am still waiting for that call.


As a last-ditch effort, I took Angelo back to my hometown vet who was over 3 hours away. After spending all that money I turned around and spent more to travel. I allowed Angelo to go outside with his real mother (who we still take care of) and enjoy nature, thinking that might help. I went around to vets that were open on that day, which was a Sunday, just to see if there was anything they could do. They were very cold and unhelpful. I was able to make it to Monday morning to see my preferred vet who always works with me on costs, though I was biting my nails all night long. He presented me with a 1st case and 2nd case option: attempt catheterization again and take him home, or drain his bladder while under anesthesia using a needle. The total cost would be $273 . I left feeling hopeful that one would work, and went home to rest. I exhausted my CareOne Credit balance to afford it.


Angelo’s Last Moments
When I woke up I had several missed calls from the vet. I was sitting on the toilet (how ironic) when he told me that my Angelo had suddenly passed away. He couldn’t be catheterized but his bladder had been emptied. When back in his cage, he crashed, probably overwhelmed by all of the treatments, medication, and discomfort. My vet said it may have been kidney failure. There was a major blockage. He had been in pain.


When I heard that I was so angry — mostly with myself.


I was overcome with emotion and, again, just went to pick him up. They handed him to me in a large cardboard box. I didn’t even have a chance to hold him as he passed away. I took him out of the box and laid him on my lap as we drove home together. Using the same blanket I had held him in countless times as I administered medications, I wrapped him up, hugged him, and eventually laid him to rest.


In retrospect, I would have never put him through all of those treatments. I wanted him here for me, but was not considering what I was putting him through by holding on for too long. I ended up spending in excess of $1,800 and I still lost him.


And I still have to pay off the CareOne Credit balance. Sigh. That’s life, I guess.


Another thing I learned from this experience. We love our pets and we want them here for as long as possible, but at some point we have to let them go and let them be at peace. I may still be hurting about the loss of Angelo, but he’s certainly not. He’s free from his mortal coil. And I should have acted sooner to give him that release.


I have more cats to care for. When it’s their time, I’ll just hold them close, talk/sing to them, and give them the comfort they need in their last moments.


More Lessons
I also know now, without a doubt, from this experience that many American veterinary practices thrive because they manage to drain desperate pet owners dry at their most vulnerable moments. It’s damned good to be a vet! That’s probably why there’s one on just about every corner.


I also learned that as much as I may love my pets, I simply am not well off enough to spend over $1,500 for a vet bill. If the total treatment cost would exceed $250, I would have to make a difficult decision quickly, giving the pet release if she or he is in pain. Of course that would be different if I had a six-figure income, but as that vet told me “I have my salary, and she has hers.”


Some vets will also try to guilt trip you and make you feel like you are a bad pet parent if you do not lay out the money. They suggest that maybe you should give the pet you’ve loved and cared for for years up to a charitable organization.


One of the vets even suggested that I crowdfund the cost of their services. No veterinary doctor, how about you charge on a sliding scale and consider financial hardship cases if you really care about animals?


All in all, I’m still very bothered by this situation, even though I know Angelo is free from this often cruel world and deep down I know that I did my best to save him.


I try to imagine him playing, jumping, and chasing butterflies in a field, soaking up the sunshine. In a better place.


Ti amo Angelo!


Dedicated to Angelo Spumoni Cannoli (MLM)


Angelo (left) with his buddy.


Posted by Jas

Share this:

  • Click to share on X (Opens in new window) X
  • Click to share on Facebook (Opens in new window) Facebook
  • Click to share on Pinterest (Opens in new window) Pinterest
  • Click to share on Tumblr (Opens in new window) Tumblr
  • Click to share on LinkedIn (Opens in new window) LinkedIn
  • Click to email a link to a friend (Opens in new window) Email
  • Click to print (Opens in new window) Print
  • More
  • Click to share on Reddit (Opens in new window) Reddit
  • Click to share on Pocket (Opens in new window) Pocket

Filed Under: Cat Central, Pets

How to Make Gel Press On Nails Last Longer

March 25, 2018 By LovingOurHome.com Leave a Comment

I used to spend upwards of $50 per appointment to have my nails done with damaging acrylics. More for a gel nail treatment. An expensive but necessary step if I wanted to have pretty, strong, painted nails that lasted for at least a few weeks. A couple of years ago, I started to use gel press on nail kits as an alternative. They only cost about $10 per box, they’re easy to install (just add adhesive, press, and file), and they look almost exactly like a gel treatment at the nail salon. Here’s a recent installation of gel press on nails that I did:


Pretty Metallic Nails

Gel Nails

I got compliments on my nails from everyone who saw them. They couldn’t believe that they weren’t done at the salon (you don’t have to tell them!). The only problem with gel press on nails is that they don’t last very long. You’re lucky to get the nails to stay on for a weekend. Here are a few tips I used to extend the wear to two weeks.

Apply Both the Glue and the Adhesive Strip

kiss gel nails

This is the exact gel nail kit that I used (you might be able to find it in stores). Kiss has a lot of very attractive styles (see more here). The directions tell you to choose between using the glue provided and the adhesive strips. I decided to use both and it made all the difference. I placed the adhesive on the inside of the nail, then placed glue on my nail. I pressed them together and waited about five seconds. The whole installation took about 15 minutes. FYI, I tried putting just the adhesive strip on one nail and it popped off after just a few hours. So use both the glue and the adhesive strip.

Cover Your Hands with Gloves When Washing Dishes

When you’re wearing gel press on nails, they come loose fast because of constant contact with water. The more your hands come into contact with water, the more the glue loses its grip. So when you do everyday tasks at home you have to try to protect the nails from water. One tip is to wear rubber gloves when you wash your dishes or clean up around the house. In fact, you might even want to wear those gloves when you’re showering to limit contact with water.

Use Hand Sanitizer Instead of Hand Washing

Of course you can’t go throughout the day without washing your hands for sanitary reasons. And if you’re like me, you wash your hands pretty frequently. Keep a bottle of hand sanitizer near the sink and on your person to keep your hands clean. Even if you do wash your hands a few times during the day, which I do, the hand sanitizer will reduce your contact with water.

Avoid Opening Cans With These Nails

Gel press on nails are not strong enough to use to open cans of soda or similar items. Use the side of your finger or a fork instead. Avoid using your nails for anything besides looking good.

These tips should allow you to enjoy your pretty gel press on nails for up to two weeks–maybe longer. One or two might come off during that time, but you can just add a bit more glue and reattach. Get ready for a lot of compliments while you’re wearing them!

Gel Press On Nails


Posted by Kristina

Share this:

  • Click to share on X (Opens in new window) X
  • Click to share on Facebook (Opens in new window) Facebook
  • Click to share on Pinterest (Opens in new window) Pinterest
  • Click to share on Tumblr (Opens in new window) Tumblr
  • Click to share on LinkedIn (Opens in new window) LinkedIn
  • Click to email a link to a friend (Opens in new window) Email
  • Click to print (Opens in new window) Print
  • More
  • Click to share on Reddit (Opens in new window) Reddit
  • Click to share on Pocket (Opens in new window) Pocket

Filed Under: Beauty Tips, Shopping Advice, Things That Make Life Easier

Things That Are Making Your Home Look Dated (And How to Update Them)

September 29, 2017 By LovingOurHome.com Leave a Comment

When you move into a home that has been around for over 30 years, it’s normal for it to have some features that look dated. If you take a closer look, you’ll find that there are probably a few specific things around the house that are making the home look old-fashioned. Here are a few things to look out for if you want to modernize your home. You can overcome some of these issues yourself—just add them to your do-it-yourself project list.


Old-School Kitchen Cabinets

Old Kitchen Cabinets

Image: Flickr/lisa_yarost 


One of the first places to check for dated features in your home is the kitchen. Worn down cabinets with frayed edges that are made of plywood or an inferior grade of wood should be replaced if you want the home to look more modern. You don’t have to do an entire kitchen remodel to rectify this problem—just update the cabinets for now.

Updated Kitchen

Image: Flickr/frederickhomesforsale 


Peeling, Chipped Paint

chipped paint‘

Image: Flickr/deanhochman 


After years of adding new layers of paint to your walls and ceilings, eventually the paint will begin to chip. Chipped away paint will make your rooms look old and unfinished. Peeling paint on the exterior of a home is also a sign of an aging home. You’ll either need to sand down the chipped areas and repaint them or completely remove the paint from your surface and start anew. However, keep in mind that older homes may contain paint that was made with lead, so it’s not always advisable to sand layers of paint for health reasons.


Old-Fashioned Wallpaper

ugly wallpaper

Photo: Flickr/9979792@N04 


Designer wallpaper can be a beautiful addition to a room, but keeping old-fashioned, floral wallpaper in a room, especially the kitchen, will make it look outmoded. This is especially true if the wallpaper has browned or looks dirty. Clean, smooth, painted walls will instantly make a room look more modern. If you insist on wallpaper, choose bold prints that have a clearly defined solid background color. Here is how the rooms in a more modern home look (bright colors, painted, clean):

painted room

Photo: Flickr/strocel 


Unfinished or Painted Wood Floors

old wood floor

Photo: Flickr/ninjanna 


One common trait of older homes is unfinished wood floors. To make them look more attractive, homeowners of the past often painted them. Sanding the floors, staining them, and finishing them with a polyurethane coating will help bring old wood floors up to date. If the floor boards are beyond repair, laminate wood flooring will cover up the problem.

restored hardwood

Photo: Flickr/shawnhenning 


Air Conditioners Hanging Out of Windows

air conditioner hanging out window

Photo: Flickr/quinndombrowski 


Nothing makes the exterior of a home look dated quite like multiple air conditioners hanging out of the windows. Over time, the back of air conditioners become dirty and start to drip fluids. If you want your home to look and feel more modern, invest in a cooling system that will manage the temperature throughout your house from one central unit. For a more affordable fix, place portable ACs in your rooms–

portable air conditioner

Image courtesy of Amazon


Aging Wooden Window Frames

old wood windows

Image courtesy of Pixabay 


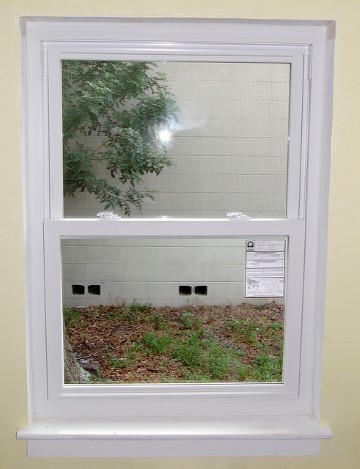
In the past, the standard for homes was wooden window frames. The frames were crudely nailed together and mounted with glass panes. Over time these frames begin to chip, crack, and allow drafts to come into the home. One easy way to update a dated home is to have the windows upgraded to vinyl. Vinyl replacement windows are the new standard for homes and they are relatively easy to install.

new vinyl window

Photo: Flickr/cjscott69 


Popcorn Ceilings

popcorn ceiling

Photo: Flickr/96831183@N08 


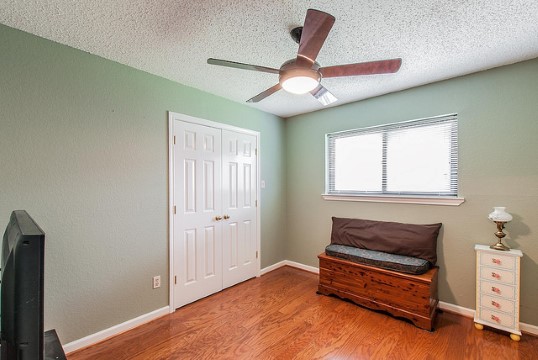
A mildly textured ceiling can be attractive, but a “popcorn” texture should be avoided if you want your rooms to look modern. Popcorn ceilings have a bumpy, pilled surface. This texture was popular in homes built as early as the 1930s. Not only do they make the room look older, they can also make it look smaller and feel less comfortable. Remove the texture and paint your ceilings with a high gloss paint for a more modern look.

Smooth Ceiling

Photo: Flickr/mufan96 


Linoleum Flooring in the Kitchen or Bathroom

linoleum floors

Photo: Flickr/vvasquez 


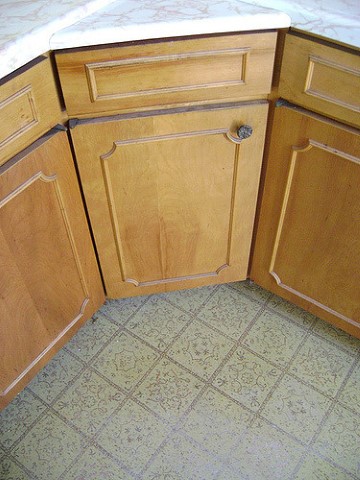
Linoleum flooring is easy to install and relatively attractive, which is why so many homeowners opt for it. But some of the patterns can make a kitchen or bathroom look older than it really is. Also, over time linoleum will begin to peel around the edges of the room and get scratched or scuffed by foot traffic. For a more modern kitchen, go for durable stone tile or laminate flooring.


Dated Lighting Fixtures

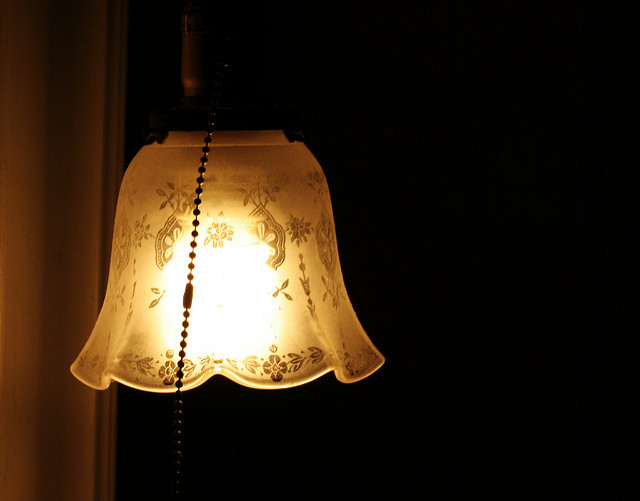
dated light fixtures

Photo: Flickr/clairity 


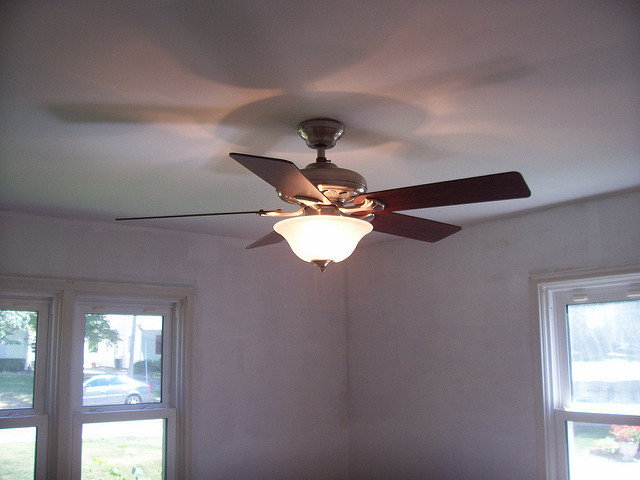
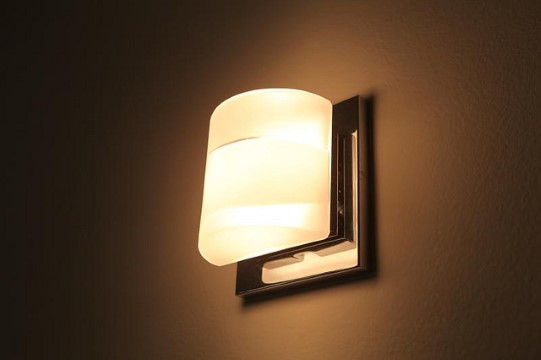
Antique, old-fashioned lighting fixtures around your home can make it look dated. This includes milk glass globes and ceramic flush mount ceiling fixtures. Replacing fixtures, which sometimes takes just a few minutes, can significantly modernize your rooms. Opt for brass wall sconces, recessed lights, and hanging pendant lights.  Use stylish lamps in bedrooms and living areas. Also, consider installing track lights in rooms where you often entertain guests. Here’s an idea for a more modern light fixture:

Modern Light Fixture

Photo: Flickr/chiropractic 


Doors and Doorknobs

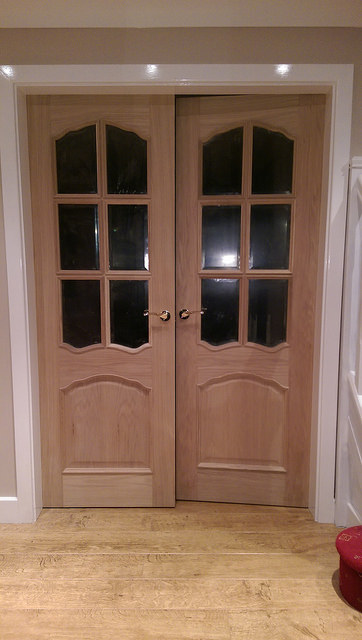
modern doors

Photo: Flickr/budda 


A clear sign of an older house is the quality, material, and design of the doors throughout. Consider replacing a single door with double doors where appropriate. Go for a solid wood or brightly painted door over fiberglass, steel, or aluminum. Replace plain wood slab doors with hand-crafted doors. You can also upgrade a door by simply changing the doorknob. Levers and key-entry locks are preferable to standard knob styles if you want a more modern looking home.


Once you take care of these issues that may be making your home look dated, you’ll probably have more of an eye for how to modernize your home. Time to get to work!


Share this:

  • Click to share on X (Opens in new window) X
  • Click to share on Facebook (Opens in new window) Facebook
  • Click to share on Pinterest (Opens in new window) Pinterest
  • Click to share on Tumblr (Opens in new window) Tumblr
  • Click to share on LinkedIn (Opens in new window) LinkedIn
  • Click to email a link to a friend (Opens in new window) Email
  • Click to print (Opens in new window) Print
  • More
  • Click to share on Reddit (Opens in new window) Reddit
  • Click to share on Pocket (Opens in new window) Pocket

Filed Under: Home Decor and Design, Home Tips

10 Things Every Single Lady Should Have in Her Home or Apartment

September 15, 2017 By LovingOurHome.com Leave a Comment

It ain’t easy being a single woman who lives by herself. You have to take the garbage out, get rid of bugs, and look out for yourself. You have to be a maverick of sorts—resourceful and resilient.

But living on your own can also be very peaceful and relaxing. I mean, for one, there’s no need to argue with a crazy roommate or boyfriend who leaves their stuff around the house and piles up dirty dishes. You can dress however you want when you’re cooking eggs in the morning. You have privacy, and your home stays exactly the way you want it to be every day.

I’ve enjoyed this way of living for years now, and I wouldn’t have it any other way (unless an ideal soulmate were to float from the heavens maybe?). I still enjoy spending time with people and socializing, but when I come home I like being in my own private “queendom.”

So here are 10 items every single lady should ideally have in her home or apartment. They’ll help you feel more comfortable, protected, relaxed, and contented.

Door Stopper or Jammer

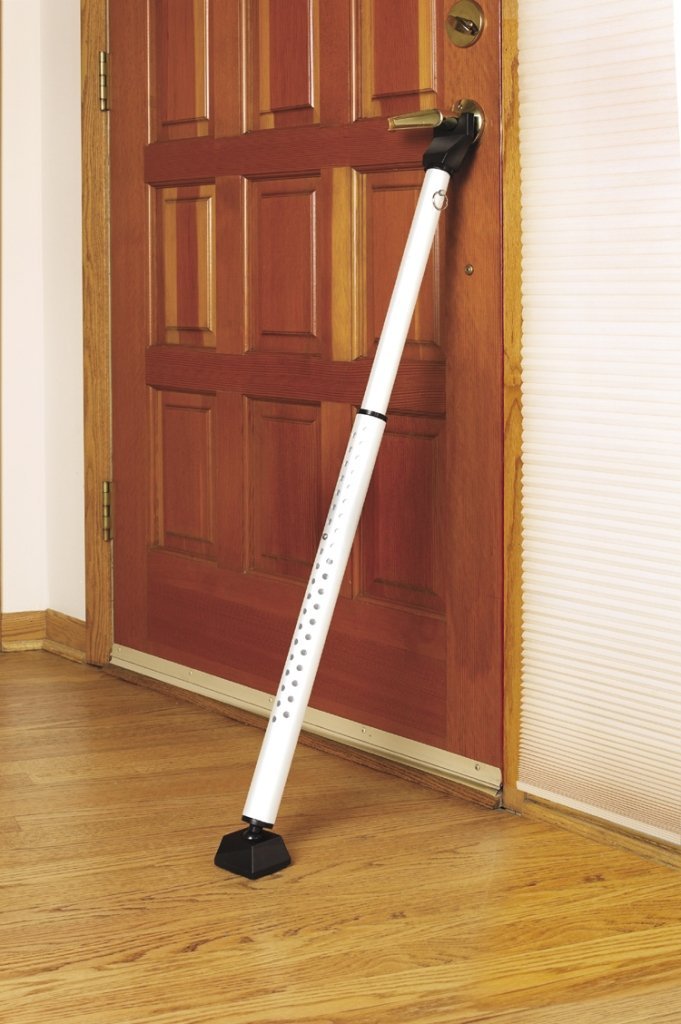
Get a door stopper for all of the doors on your first floor. They come in several designs—one fits inside of the door jamb and another adjustable version reaches from the door knob to the floor. You’ll feel more secure in the evenings knowing that there’s no way for the doors to be opened from the outside (it’s scientifically impossible). It’s also a really good idea if you have a pesky ex-boyfriend who disappeared with a set of keys to your apartment.


A Canopy Over Your Bed

Your bed becomes an oasis of sorts when you’re single. You can spread out over the whole thing, stretch out and enjoy every inch of it. You’ll feel like a princess when you go to sleep at night under a bed canopy. What is that? It’s an elegant covering that is usually made of chiffon, linen, or some similar lightweight fabric. It’s easy to hang from the ceiling above your bed. Another benefit is that it keeps pesky mosquitoes away, so you can open your window at night in the summer and feel the gentle breeze.

A Good Pot and Pan Set That Will Encourage You to Cook More

A lot of single people order takeout or eat out almost every day, which can wreak havoc on their budgets. Sometimes all you need is a nice pot and pan set to get motivated to cook more at home. Invest in a non-stick frying pan and a set of cooking pots (small, medium, large). Use the frying pan for breakfast and frying meats. Use the small pot for rice and oodles of noodles. With time, you’ll find a use for the medium and large pots. I use them for making stews and steaming veggies.

* While you’re at it, head to your local Dollar Tree and pick up small rectangular aluminum cooking pans. They’re perfect for roasting veggies just for you, and baking chicken or steak with onions and potatoes.


A Wireless Monitoring System

You will have more peace of mind when you’re away with a wireless video monitoring system in your home. As long as you have Wifi running in your house at all times, you can set up a system in minutes. Some wireless monitoring devices allow you to check an app at any moment of the day to see what’s going on at home. It can be particularly useful if you have pets you want to look after.


A Reliable Bug and Pest Repellent

One of the most annoying things you’ll have to deal with as a single woman is having to kill pests and bugs on your own. That’s something that we usually count on the guys to handle, but when you’re on your own you have put on your big girl pants and get the job done! It gets easier over time.

Get these three things to minimize drama with pests:

  • An ultrasonic pest repeller (keeps bugs and rodents from invading your space in the first place).
  • A fogger (kills bugs that are hiding in places you can’t even see — must leave house vacant for over 4 hours).
  • A quality bug spray (Raid Max is the best in my opinion—a little expensive but worth it. If you can’t find it only, look for it at a Shoprite or a similar supermarket).


A First Class Recliner (The Queen’s Seat)

When you aren’t spending time in your bed, you should have a really comfy recliner as your second option. Couches can be uncomfortable, and they might make you feel a little lonely with all that extra, unnecessary space. A recliner is for the contentedly single lady who wants to lay back in luxurious comfort while reading a book, watching Broad City, or working on her blog.


Bluetooth Speakers in Your Most Frequented Rooms

When you’re single and on your own, you constantly need motivation to stay in a good mood when you’re at home alone. Make sure you have Bluetooth stereos (or a little mini FM radio) set up in every important room of your home (kitchen, bathroom, dining area) so that you will always have some tunes playing. It may seem like a small matter, but it really makes a difference.


A Really Amazinggg Showerhead

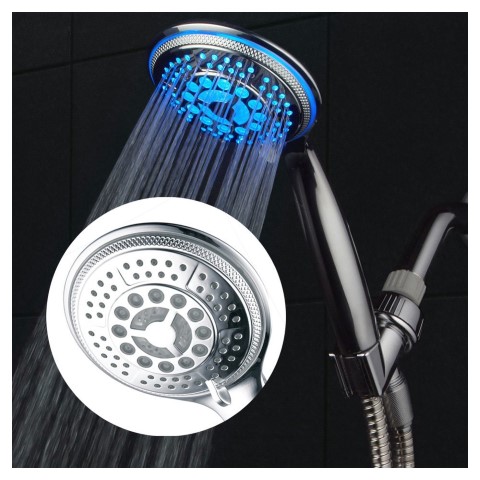
After a long day at work, you want to come home and take a long, satisfyingly sensual shower. You can’t do that when your shower head is pitifully weak and barely spouts out any water. Invest in a quality showerhead that gives you multiple options when it comes to water flow. Some are easy to install on your own.


Pepper Spray

Did you know you can buy all manner of pepper spray products online at Amazon and other sites? There are items you can carry on your person and that you can keep in your home. It’s a peace of mind purchase for single women who live alone.


An Elegant Vanity Set

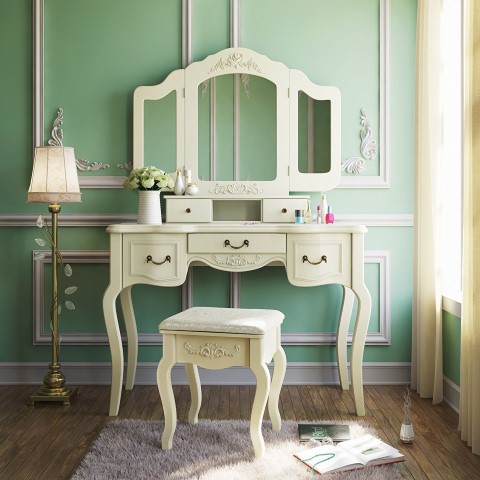
You should pamper yourself even more than usual when you’re a single girl. Self-care is important. Back in the day, our moms and grandmoms would sit at elegant vanities when they brushed their hair, did their makeup and painted their nails. A proper vanity consists of a stool, mirror, and small table. Try to find one with lights around the mirror so that you can see your face more clearly.

Check out these things that a single lady should have in her home, and get a few if think they’ll make your life easier. From one single lady to another, they are an investment in your peace of mind and happiness.

Share this:

  • Click to share on X (Opens in new window) X
  • Click to share on Facebook (Opens in new window) Facebook
  • Click to share on Pinterest (Opens in new window) Pinterest
  • Click to share on Tumblr (Opens in new window) Tumblr
  • Click to share on LinkedIn (Opens in new window) LinkedIn
  • Click to email a link to a friend (Opens in new window) Email
  • Click to print (Opens in new window) Print
  • More
  • Click to share on Reddit (Opens in new window) Reddit
  • Click to share on Pocket (Opens in new window) Pocket

Filed Under: Dating, Love and Relationships, Home Improvement, Home Tips, Things That Make Life Easier

  • « Go to Previous Page
  • Page 1
  • Page 2
  • Page 3
  • Page 4
  • Page 5
  • Interim pages omitted …
  • Page 51
  • Go to Next Page »

Primary Sidebar

Categories

  • Beauty Tips
  • Cat Central
  • Dating, Love and Relationships
  • Food & Recipes
  • Health and Wellness
  • Home Buying or Renting
  • Home Care and Cleaning
  • Home Decor and Design
  • Home Equipment and Appliances
  • Home Finance and Budgeting
  • Home Improvement
  • Home Tips
  • Life Thoughts by Jas
  • Light Simple
  • Motivation and Self Help
  • Parenting Advice & Tips
  • Parties, Events, Holidays, Fun
  • Pest Control
  • Pets
  • Product Reviews
  • Quick Tips
  • Quotes
  • Shopping Advice
  • Special Deals
  • Summer Products
  • The Funnies
  • Things That Make Life Easier
  • Uncategorized
  • Yard Work & Gardening

Copyright © 2025 · Genesis Sample on Genesis Framework · WordPress · Log in