• Skip to primary navigation
  • Skip to main content
  • Skip to primary sidebar
  • Home
  • Posts
    • Home Care and Cleaning
    • Home Decor and Design
    • Yard Work & Gardening
    • Food & Recipes
    • Pets
    • Health and Wellness
    • Motivation and Self Help
    • Home Tips
    • Parenting Advice & Tips
    • Parties, Events, Holidays, Fun
    • Things That Make Life Easier
    • Home Finance and Budgeting
    • Shopping Advice
  • Cat Central
  • Share a Home Tip
  • Got a Question?

Loving Our Home | Home Tips, Advice, and Easy Recipes

Simple Home Tips and Solutions

Returning to Your Childhood Home As An Adult

September 8, 2014 By LovingOurHome.com Leave a Comment


I sincerely enjoy returning to the childhood home where I was raised to visit my parents. There are so many memories packed into every inch of that house. For example, when I look at the stair case, I can vividly remember sliding down those same stairs on a cardboard box, having fun for hours.

However, there are certain realizations, as adults, that we need to keep in mind when returning to our parents home. In this economic climate some of us need to return to our parents home due loss of employment, home or spouse. First of all, I feel so fortunate to have the opportunity to visit the home where I had so many minor and major life experiences. Yet, on my previous visit to my parents, I realized that I needed to change my mind set when visiting my parents. I noticed that although their energy and thrust for life was still present, there was something different about them. My mom, for instance, did not cook the same and my dad no longer enjoyed his outside chores. My mom instead, chose to either order out or cook a meal in the microwave. While my dad had hired landscapers to do all of the outside chores. Seeing that took me for a loop. Growing up my mom cooked three homemade meals a day including desserts and my dad lavished on his lawn, garden and flowers. I then opened my eyes a little wider and realized that after all of the years that they both had taken care of their children and instilled in all of us a sense of duty and pride in our accomplishments, they were tired. Tired of having to teach, listen, cook, work hard to show us how to properly run a happy and prideful family.

Now, when I visit my parents with my mate and children, I make sure that everyone is actively involved with the daily chores. Such as, cooking, cleaning and removal of garbage. I basically attempt to give them a break from doing these chores while my family visits. After all, we are the ones adding to the untidiness to the house. It pains me now to think of how many meals were cooked for me, as an adult, while I sat down in the living room waiting to be told, by mom, that dinner was ready. Me and my family now instruct her to sit and wait to be called for dinner. Of course, she is never to far from the kitchen to ensure that I am precisely following her recipes!! As for dad, if there were any chores he wanted done outside on the property, we all pitched in, while again he sat and watched making sure it was done the way he wanted.

I guess my best advice, is to make yourself a commodity. In other words, PITCH in! No adult lives for free, so if you are moving back home, any income you bring into the home, your parents should most definitely receive a percentage. If you are visiting, make a trip to the grocers to buy all of the necessary foods that you or your family enjoy. Don’t just sit on the couch, ask your parents if they need anything done in or outside of the home. I can say that my parents enjoyed my family more because we truly acted like a family. We also bonded in more ways because we were all actively enjoying one another’s company. As our parents age, they appreciate any and all help given.

I hope that this advice about returning to your childhood home has made someone re-evaluate their parents and show more appreciation to them.


Posted by Lorraine

Share this:

  • Click to share on X (Opens in new window) X
  • Click to share on Facebook (Opens in new window) Facebook
  • Click to share on Pinterest (Opens in new window) Pinterest
  • Click to share on Tumblr (Opens in new window) Tumblr
  • Click to share on LinkedIn (Opens in new window) LinkedIn
  • Click to email a link to a friend (Opens in new window) Email
  • Click to print (Opens in new window) Print
  • More
  • Click to share on Reddit (Opens in new window) Reddit
  • Click to share on Pocket (Opens in new window) Pocket

Filed Under: Motivation and Self Help, Parenting Advice & Tips Tagged With: childhood home, childhood memories, life advice, life tips, parenting, returning home

Mama’s Homemade Garlic Knots

August 29, 2014 By LovingOurHome.com Leave a Comment

For many years I enjoyed eating garlic knots when dining at my local Italian pizzeria. My love for a great garlic knot made me want to make them fresh at home for me and my family to enjoy with a variety of meals.

Garlic knots are a excellent addition when eating at home when combined with a tasty lasagna or spaghetti and sauce dinner. You can make your homemade garlic knots as big or as small as you want. I have even went as far to bring a large tray of the knots to a social gathering with a large side of store bought marinara sauce and received rave reviews from all of the guests. The best is when you add cheese to the top of the knot, just before you remove knots from the oven. I have used mozzarella cheese, Asiago cheese, Parmesan cheese, Romano cheese and they all gave the knots added flavor.

Here is my own secret recipe to having an awesome homemade garlic knot.

Ingredients

image1 Bag of pizza dough ( found at most grocery stores )

1 Large jar of marinara sauce ( brand of your choice )

1 Tablespoon of garlic powder

1/2 Teaspoon of salt (more can be sprinkled to the knot when cooking is completed, if desired)

1/4 Cup extra virgin olive oil

1 head of garlic, thinly sliced

Instructions ( yields 16-20 garlic knots )

Preheat oven to 425-450 degrees Place your dough on a floured surface, covering entire dough with a light dusting of flour Pinch off a piece of dough a little smaller than a golf ball, repeat until dough is gone Roll dough on floured surface until dough is approximately 3-4 inches long (you can use both of your hands to elongate the dough). Tie each piece of dough, simply into a knot. Place knots onto a large non stick cookie sheet or use a non stick cooking spray on a regular cookie sheet.

Sprinkle the garlic powder and salt over entire sheet of knots. Drizzle your olive oil over the knots generously Place knots in preheated oven for 8-11 minutes Meanwhile, sautée the thinly slice head of garlic in a small pan with a little olive oil on medium heat. Sautée until soft (do not burn garlic!). On minute 5 of the baking process, pour the cooked garlic over the entire sheet of knots. Return to oven for approximately 3-4 minutes. Remove knots when golden brown.

Enjoy garlic knots by themselves or with your favorite marinara sauce. My family truly enjoys eating the garlic knots as an appetizer or as a part of a meal. You can easily add your cheese of choice to make the knot more filling. I have even enjoyed a few garlic knots with a side salad with vinaigrette dressing as a dinner. I once made a large batch of garlic knots ( too much to eat for the week ) and froze them in an airtight container. They actually lasted for 10-14 days with the same awesome results when baked.

You won’t regret trying this recipe for Homemade Garlic Knots!!!

image

Posted by Eve

Share this:

  • Click to share on X (Opens in new window) X
  • Click to share on Facebook (Opens in new window) Facebook
  • Click to share on Pinterest (Opens in new window) Pinterest
  • Click to share on Tumblr (Opens in new window) Tumblr
  • Click to share on LinkedIn (Opens in new window) LinkedIn
  • Click to email a link to a friend (Opens in new window) Email
  • Click to print (Opens in new window) Print
  • More
  • Click to share on Reddit (Opens in new window) Reddit
  • Click to share on Pocket (Opens in new window) Pocket

Filed Under: Food & Recipes Tagged With: evelyns recipes, food, homemade garlic knots, recipes

Evelyn’s Cheesy Pizza Recipe

August 29, 2014 By LovingOurHome.com Leave a Comment

Most American’s, including myself, enjoy purchasing a pizza pie at their favorite Italian restaurant. One day, I decided to make a pizza at home with the assistance of my young children. The result was a fun day in the kitchen, cooking and laughing with my kids. We all learned that it was possible to make a quality pizza at home. I’m pleased to share my Cheesy Pizza recipe with the world — a dinner dish that the whole family can enjoy.

Ingredients

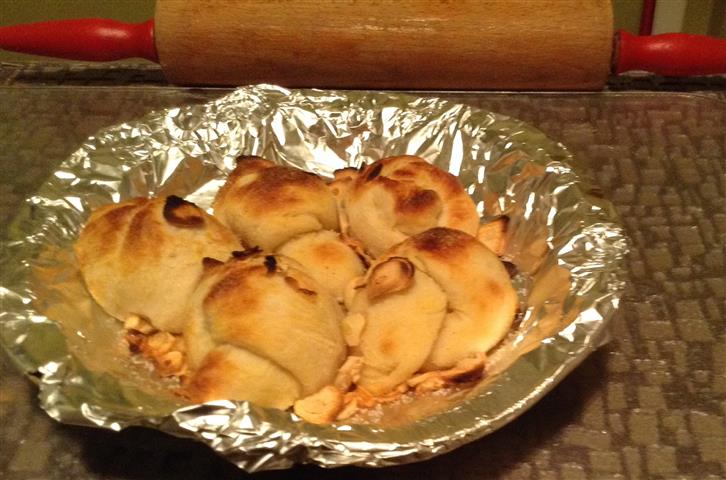
1 bag of pizza dough ( found at most grocery stores )
1 12 ounce jar of pizza sauce ( brand of your choice )
1 lb mozzarella cheese ( whole milk )
1/3 cup all purpose white flour
1 tablespoon cooking oil or non stick cooking spray

Instructions

Preheat oven 425-450 degrees
On a flat cooking surface, place a good sprinkle of flour onto surface
Place dough onto floured surface
Sprinkle a little more flour on top of dough ( to ensure dough doesn’t stick to surface )
Work dough until you create a circle ( resembling a pizza)
Continue with a rolling pin to further flatten and enlarge dough until large enough to fit in your pizza pan
Grease pan with oil or non stick cooking spray
Carefully place dough onto pizza pan and put aside
Shred your block of mozzarella or you can purchase mozzarella pre-shredded (I think Polly O cheese made with whole milk is the best cheese for this recipe, but it’s up to you )
Open your jar of pizza sauce, pour half of the sauce in the middle of the dough
With a large spoon, spread sauce in a circular motion to the edge of the dough ( don’t add to much sauce )
Sprinkle the mozzarella evenly on the entire pizza
Add your other toppings, it’s your choice, for example, pepperoni, onions, green peppers, chicken breast cubed, pineapples, etc…
Place pan into your preheated oven for 12-16 minutes, until dough is brown/cooked and cheese is melted
Let pizza stand for 2-3 minutes before slicing (because cheese needs to cool off a bit for easier slicing)

With this Cheesy Pizza recipe, the outcomes are endless. You can put certain toppings on each portion of the pizza, if you have a finicky eater or just load the pizza with foods that you enjoy.

Mangiare!!!

Share this:

  • Click to share on X (Opens in new window) X
  • Click to share on Facebook (Opens in new window) Facebook
  • Click to share on Pinterest (Opens in new window) Pinterest
  • Click to share on Tumblr (Opens in new window) Tumblr
  • Click to share on LinkedIn (Opens in new window) LinkedIn
  • Click to email a link to a friend (Opens in new window) Email
  • Click to print (Opens in new window) Print
  • More
  • Click to share on Reddit (Opens in new window) Reddit
  • Click to share on Pocket (Opens in new window) Pocket

Filed Under: Food & Recipes Tagged With: cheesy pizza, evelyns recipes, food, recipes

Evelyn’s Sweet and Crunchy Chicken Fingers

August 22, 2014 By LovingOurHome.com Leave a Comment

One evening, I found myself staring at the chicken breast that I had on the on the cutting board, wondering how else can I prepare the breasts for dinner. You see, I was tired (the kids too) of grilling the chicken breast with seasoning and frying it with white flour. So, I opened my kitchen cabinet and exposed all the the breakfast cereal that I had at that time.

Eureka!! I found a sweet and crunchy cereal that I thought would be excellent with the chicken breast. I incorporated my past experience of preparing chicken, as I was taught as a teenager, by my mother and devised a recipe that my kids absolutely adored. I also, instead of just using ketchup, came up with a creamy honey mustard sauce with a kick, to dip the chicken breasts in. Check out this amazing recipe for Sweet And Crunchy Chicken Fingers — you will totally enjoy it if you appreciate sweet tasting foods. This recipe should feed a family of three to four.

Ingredients

Dipping Sauce ( make the sauce first )

4 Tablespoons of mayonnaise
2 Teaspoons of spicy brown mustard
1 Teaspoon of horseradish
2 Tablespoons of honey

Instructions

Combine all the sauce components
Mix well
Taste for sweetness
Place in refrigerator while chicken is being cooked

Ingredients

3-4 Pounds of skinless chicken breast
1 1/2 Cups of all purpose flour
2 Cups of sweet crunchy cereal
2 1/2 Teaspoons of garlic powder
1 Teaspoon of salt
1 Teaspoon of black pepper
1/4 Teaspoon of cayenne pepper (optional)
2 Large eggs
1/2 Cup of water
1 Cup of oil

Instructions

In a large bowl combine
Flour
Garlic powder
Cayenne (optional)
Salt and pepper

Place the sweet cereal in a food processor and pulse on low 4-5 times (do not want to make into powder)

Combine the sweet cereal and the flour
Stir with a large spoon to mix all together

In a medium size bowl combine
Eggs and water
Whisk together

On a large cutting board slice the chicken breasts into 1/4 inch strips

In a large fry pan add oil and turn on medium high heat

Once oil is hot you can now:

Take one chicken strip and lightly dredge in flour. ( shake off excess flour)

Place floured chicken strip into egg mixture. ( make sure strip is totally covered with egg )

Replace chicken strip in flour and totally cover with flour and place strip carefully into hot oil.

Repeat these steps for remainder of chicken breasts.

Turn chicken strip over to cook both sides of chicken strip.

Cook until golden brown

NOTE:
Chicken cooks fast, so do not let it burn or dry out!!

Serve your Sweet And Crunchy Chicken Fingers with dipping sauce on the side.

ENJOY!!!


Posted by Eve

Share this:

  • Click to share on X (Opens in new window) X
  • Click to share on Facebook (Opens in new window) Facebook
  • Click to share on Pinterest (Opens in new window) Pinterest
  • Click to share on Tumblr (Opens in new window) Tumblr
  • Click to share on LinkedIn (Opens in new window) LinkedIn
  • Click to email a link to a friend (Opens in new window) Email
  • Click to print (Opens in new window) Print
  • More
  • Click to share on Reddit (Opens in new window) Reddit
  • Click to share on Pocket (Opens in new window) Pocket

Filed Under: Food & Recipes Tagged With: chicken fingers, evelyns recipes, food, recipes

Evelyn’s Fresh Summer Seafood Salad

August 21, 2014 By LovingOurHome.com Leave a Comment

As I am sure, many of us hate to cook in the summer months. Sweating while making a hot meal is unbearable in the summers scorching heat. If you are like me, I do not care for being overwhelmed, in a hot kitchen while making a meal. My first solution was to eat heroes made with lettuce, salami, turkey, tomatoes and cheese. I did this for a while but, I was quickly bored with eating cold sandwiches made with lunch meat, on a daily basis.

So, I sat one afternoon, while enjoying a cold glass of iced tea on my sofa and came up with a different option for my summer meals. I remembered that my mother loved seafood and used to make concoctions made up of either shrimp, crab or lobster when she did not want to make a hot meal in the summer for our family. So, I tweaked my mom’s recipe and chose an affordable, low cost option, using imitation crab meat. Imitation crab meat can be found at your local grocery store in the fresh or frozen section of the fish department. Imitation crab meat has a very similar taste to real crab meat and costs a lot less. You can enjoy this recipe for Fresh Summer Seafood Salad on crackers, rolls, pita bread, lettuce cups or by itself.

Ingredients

1 Package of imitation crab meat
1 Medium sized cucumber peeled and finely diced
1/4 Cup of sweet onion very finely diced
2 Tablespoons of mayonnaise
2 Tablespoons of fresh lemon or lime juice
1/4 Teaspoon of salt
1/4 Teaspoon of black pepper

Instructions

In a medium sized bowl shred imitation crab meat with your fingers until it is all broken apart.
Add:
Finely diced onion
Diced cucumber
Mayonnaise
Lemon/ lime juice
Salt & pepper

Fold all ingredients gently in the bowl.
Taste to determine if any further mayonnaise, salt and/ or pepper is needed.

Cover bowl with plastic wrap and place in refrigerator for 30 minutes to let the flavors combine.

Let it be known, that you can most definitely substitute the imitation crab meat in this recipe, with the seafood of you liking. For example, real crab meat, shrimp, lobster or cooked scallops. I have tried and enjoyed them all. It all depended on, if I could find a good price for the unfrozen seafood at my local grocers.

I hope you enjoy this recipe for Fresh Summer Seafood Salad as much as I do!!

image


Posted by Eve


Share this:

  • Click to share on X (Opens in new window) X
  • Click to share on Facebook (Opens in new window) Facebook
  • Click to share on Pinterest (Opens in new window) Pinterest
  • Click to share on Tumblr (Opens in new window) Tumblr
  • Click to share on LinkedIn (Opens in new window) LinkedIn
  • Click to email a link to a friend (Opens in new window) Email
  • Click to print (Opens in new window) Print
  • More
  • Click to share on Reddit (Opens in new window) Reddit
  • Click to share on Pocket (Opens in new window) Pocket

Filed Under: Food & Recipes Tagged With: evelyns recipes, food, recipes, seafood salad

Quick Tip: Rinse Your Bacon Before Frying It

August 20, 2014 By LovingOurHome.com Leave a Comment

We all know how delicious bacon is — whether it’s with eggs and toast in the morning, on a sandwich with tomato and lettuce for lunch or mixed into a savory sauce for dinner. But as good as it tastes, many brands of bacon contain nitrates (preservatives) that aren’t good for our health — especially in large quantities. Bacon also contains a lot of excess sodium.

Quick Tip: before you fry up your bacon, rinse each slice under warm water to remove some of the nitrates and extra fat on the outer layer. You can feel it coming off on your fingers. Rinsing the bacon also reduces shrinkage when you fry it.

Don’t worry — your bacon will still taste wonderful, maybe even better!

Posted by Jade

Share this:

  • Click to share on X (Opens in new window) X
  • Click to share on Facebook (Opens in new window) Facebook
  • Click to share on Pinterest (Opens in new window) Pinterest
  • Click to share on Tumblr (Opens in new window) Tumblr
  • Click to share on LinkedIn (Opens in new window) LinkedIn
  • Click to email a link to a friend (Opens in new window) Email
  • Click to print (Opens in new window) Print
  • More
  • Click to share on Reddit (Opens in new window) Reddit
  • Click to share on Pocket (Opens in new window) Pocket

Filed Under: Food & Recipes, Quick Tips Tagged With: bacon, food, home tips

  • « Go to Previous Page
  • Page 1
  • Interim pages omitted …
  • Page 38
  • Page 39
  • Page 40
  • Page 41
  • Page 42
  • Interim pages omitted …
  • Page 51
  • Go to Next Page »

Primary Sidebar

Categories

  • Beauty Tips
  • Cat Central
  • Dating, Love and Relationships
  • Food & Recipes
  • Health and Wellness
  • Home Buying or Renting
  • Home Care and Cleaning
  • Home Decor and Design
  • Home Equipment and Appliances
  • Home Finance and Budgeting
  • Home Improvement
  • Home Tips
  • Life Thoughts by Jas
  • Light Simple
  • Motivation and Self Help
  • Parenting Advice & Tips
  • Parties, Events, Holidays, Fun
  • Pest Control
  • Pets
  • Product Reviews
  • Quick Tips
  • Quotes
  • Shopping Advice
  • Special Deals
  • Summer Products
  • The Funnies
  • Things That Make Life Easier
  • Uncategorized
  • Yard Work & Gardening

Copyright © 2025 · Genesis Sample on Genesis Framework · WordPress · Log in