• Skip to primary navigation
  • Skip to main content
  • Skip to primary sidebar
  • Home
  • Posts
    • Home Care and Cleaning
    • Home Decor and Design
    • Yard Work & Gardening
    • Food & Recipes
    • Pets
    • Health and Wellness
    • Motivation and Self Help
    • Home Tips
    • Parenting Advice & Tips
    • Parties, Events, Holidays, Fun
    • Things That Make Life Easier
    • Home Finance and Budgeting
    • Shopping Advice
  • Cat Central
  • Share a Home Tip
  • Got a Question?

Loving Our Home | Home Tips, Advice, and Easy Recipes

Simple Home Tips and Solutions

Grow Your Own Herbs at Home with a Mini Greenhouse

August 7, 2014 By LovingOurHome.com Leave a Comment

If you are like me and enjoy preparing homemade meals with fresh herbs, a mini greenhouse will allow you to have fresh herbs at your finger tips! With this small greenhouse in your home, you can grow your herbs year round.

mini greenhouseGardeners, for years have been utilizing large outdoor greenhouses to grow a variety of plants, herbs and vegetables year round. So, it just makes sense to have a mini greenhouse inside your home that can be used for the same purpose. I particularly, enjoy growing basil, parsley, dill, rosemary, cilantro and thyme.

To me, one of the most important steps to growing your own herbs is using organic soil and organic non-GMO heirloom seeds. That way you have healthy plants that you can get new seeds from year after year. You can purchase these items online or at your local nursery. After these items (including a mini greenhouse) are bought, it is now time to begin. I prefer organic seeds and soil because I want to avoid harmful man made chemicals that are now being used to produce food cheaper and faster. I also believe that organic foods taste better.

If you like to cook gourmet with fresh ingredients, you’ll save a lot of money each year by growing your own herbs. Just think of how many trips you make to the grocer’s on a yearly basis to purchase your herbs fresh or dried in containers. I use to travel to my local grocers at least four time a month to buy fresh herbs. It was costly and time consuming.

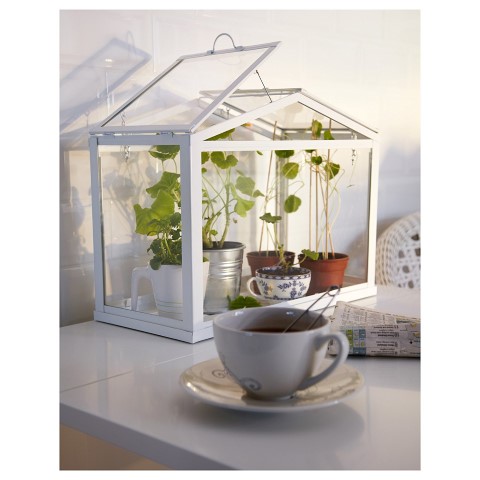
So, one day while thumbing through a magazine I saw an advertisement for an affordable mini greenhouse, that was easy to assemble. I immediately purchased it. I obtained all of my organic material and awaited for the delivery of my mini greenhouse. I was so excited! Yay, it arrived early on afternoon and I was anxious to assemble it. I made sure that I followed the instructions properly. I then filled each small sized pot with soil and labeled each pot to ensure that when I choose herbs for cooking there were no errors to be had. I fit as many pots as I could inside the greenhouse. I placed three seeds in each pot. I then, watered all of the pots, adequately. The greenhouse should be near a window that gets plenty of sunlight.

It took less than a week for my seeds to sprout. I made sure to vent the greenhouse daily to allow air to circulate and the inside temperature to cool. I was so proud when my sprouts matured into full grown plants. Now, each year I try to grow different herbs to cook with. I no longer have to purchase herbs from my neighborhood grocer. It has been extremely convenient to have all of my herbs just steps away from me to cook with.

I highly recommend that you try a mini greenhouse in your home.

Posted by Lorraine

Share this:

  • Click to share on X (Opens in new window) X
  • Click to share on Facebook (Opens in new window) Facebook
  • Click to share on Pinterest (Opens in new window) Pinterest
  • Click to share on Tumblr (Opens in new window) Tumblr
  • Click to share on LinkedIn (Opens in new window) LinkedIn
  • Click to email a link to a friend (Opens in new window) Email
  • Click to print (Opens in new window) Print
  • More
  • Click to share on Reddit (Opens in new window) Reddit
  • Click to share on Pocket (Opens in new window) Pocket

Filed Under: Things That Make Life Easier, Yard Work & Gardening Tagged With: greenhouse, growing food, herbs

How to Kill Fleas in 24 Hours or Less

August 7, 2014 By LovingOurHome.com Leave a Comment

A simple process for how to kill fleas in 24 hours or less.

People get squeamish when they learn that their animals are carrying around fleas. It’s tough to deal with the idea that fleas, flea larvae, and flea eggs are probably everywhere in your house — the carpets, the couches where your cats jump on and even your bed.

Before you panic and lock yourself in the closet, just calm down, take a breath and get a few supplies. Here is the best way to deal with a possible flea infestation (based on my own past experience with the issue):

© Johanna Goodyear | Dreamstime Stock Photos
Fluffy wants to live flea-free!
© Johanna Goodyear | Dreamstime Stock Photos

1) The first thing you want to do is treat the cats. What’s the point of cleaning up your house if your pets are just going to go right back to the area and sit down to spread more bugs? Don’t bother with cheap flea powders and collars; go right to what you know will work: a spot-on product like Revolution or a similar brand with good reviews. These products enter the pet’s blood stream to kill all unwanted parasites that bite your pet. Fleas don’t stand a chance. If you prefer a natural solution, try washing the pet with blue Palmolive dish washing liquid — fleas hate it. But I have to say, in my experience natural remedies aren’t as sure a thing as using Revolution or another spot-on solution.

2) Throw all sheets, covers, and clothes that could be infested in the washing machine and wash on a hot cycle a couple of times. You may even just want to trash them if you think they are really infested.

3) Vacuum everything including your carpets and couches thoroughly and THROW THE VACUUM BAG OUTSIDE WHEN FINISHED.

4) Use a Flea Killing Spray made for carpets and upholstery everywhere, beds, carpets, etc. This will help get rid of the adult fleas.

5) Lock your cats or dogs up in a room that doesn’t have any carpet or couches, and make sure you open a window. Even better if you only have a few pets, take them for a long ride around town with you or to a friend’s house who has an isolated room with no carpets. You don’t want your pets having the possibility of inhaling the fumes from the poisonous flea bomb you will set off.

6) Finally, set off several good flea bombs in your home and leave the house for 5-6 hours or more. Once that flea bomb does its job you are going to be in the clear, so make sure you get enough of them to cover your entire house.

The key for how to kill fleas in 24 hours or less: don’t buy cheap flea products — make sure you invest in good stuff so that you won’t have to do this all over again. You will probably end up spending about $25 or $30 for the cat treatment depending on how many cats you have and $30-$40 for the bombs and spray. That $70 is well worth the peace of mind you’ll get knowing that your home is flea-free again.

Posted by Jade

Share this:

  • Click to share on X (Opens in new window) X
  • Click to share on Facebook (Opens in new window) Facebook
  • Click to share on Pinterest (Opens in new window) Pinterest
  • Click to share on Tumblr (Opens in new window) Tumblr
  • Click to share on LinkedIn (Opens in new window) LinkedIn
  • Click to email a link to a friend (Opens in new window) Email
  • Click to print (Opens in new window) Print
  • More
  • Click to share on Reddit (Opens in new window) Reddit
  • Click to share on Pocket (Opens in new window) Pocket

Filed Under: Pest Control, Pets Tagged With: flea infestation removal, get rid of fleas, kill fleas

How to Domesticate a Feral Cat

August 7, 2014 By LovingOurHome.com Leave a Comment

Some personal advice about how to domesticate a feral cat from someone who has done it twice.

There is a lot of literature online about how to domesticate a feral cat or homeless cat and feral cat rescue, but I can add to this advice with my own personal experience taking in two feral cats.

** I personally don’t recommend trying to domesticate an older feral cat who is aggressive or won’t allow a human to touch or come near him — especially if you already have cats in your home. Use your best judgment. **

Get them Shots and Have Them Neutered

The feral cat you want to take in has probably been roaming around outside for months, mixing with other cats, raccoons, and sleeping in bushes full of ticks, fleas, and other nuisances. So before you allow a feral cat to live in the main areas of your home, you need to take them to the vet for a check up.

This is possibly the most difficult part of domesticating a feral cat because it is 1) hard to catch them in a carrier if they run from you whenever you come near and 2) sometimes difficult to get them to calm down enough to be seen by a vet. Vets usually have ways to deal with difficult cats though, so your main feat is just getting the feral cat into the cage. The TNR (Trap Neuter Return) program at your local vet or pound can lead you in the direction of some humane cat traps that close as soon as the cat enters. Sometimes you’ll get lucky and come upon a feral or outdoor cat that actually likes humans and comes right up to you.

Wash and Isolate Your Feral Cat With a Litter Box

Once the cat’s shots are done and he’s been cleared of fleas, ticks, mites and other possible problems, you can take him into your home. If the cat will allow you to handle him without going crazy (some young cats will; older ones probably not), give him a bath. If the feral cat is very scared, just lock him in the bathroom with you and talk to him for a while. Do your best to get some water and soap on his back (use a bucket with a washcloth and just rub him down). If water is out of the question, try a waterless cat shampoo (usually foam or powder) and a good cat brush. To assist the cat with future cleaning, you can also try installing a cat door that has a self-cleaning brush around the inside edges.

This will be the only time you have to clean your new feline friend since cats clean themselves. After the “bath,” envelop your new cat in a nice fluffy towel and rub him dry. This small action is a great bonding moment between you and your new feral cat. If possible, pick him up in your arms as you dry him. Whenever I have had to do this with my new cats, afterwards they felt a lot more comfortable around me.

Isolate the Cat for a While

Next you have to isolate the feral cat from the other cats in your home with a litter box in the room. The other cats will need to gradually get used to having the cat’s scent in the home. You may be surprised at how immediately he understands to go in the litter box. Isolate your new cat in a room to himself for at least a week.

Leave The Feral Cat Alone

Once you finally let the feral cat loose in your home, you have to leave it alone. He will probably run immediately to find a hiding place. He may run from you whenever you come around. That’s normal — feral cats are naturally mistrustful of humans. It will take some time for them to warm up to you. My first feral cat still runs from me many years later, but he sleeps on top of my chest at night like a baby.

Leave your new feral cat alone. Just feed him, keep his litter box clean, and eventually you’ll start to see some progress. Usually once the feral cat starts to realize that you will be feeding him every day from now on, and he knows for certain that you are not trying to hurt him, he will develop more trust for you.

Also, be patient with your feral cat if he does annoying things, like knock over the garbage and try to eat chicken bones. They are still getting used to living in a home where they don’t have to scavenge for food. Both of my feral cats did this for a couple weeks after I took them in, but eventually stopped once they saw that they could count on breakfast, lunch, and dinner each day.

A feral cat rescue mission is a noble thing. I have found that owning a feral cat is most rewarding because feral cats genuinely appreciate having a home. Feral cats have memories of what it was like living on the street, and they know that this lifestyle is much better. Love them, feed them, keep them healthy, and you will soon see the rewards of your good deed.

“We can do no great things, only small things with great love.” ~Mother Teresa

Posted by Jade

Share this:

  • Click to share on X (Opens in new window) X
  • Click to share on Facebook (Opens in new window) Facebook
  • Click to share on Pinterest (Opens in new window) Pinterest
  • Click to share on Tumblr (Opens in new window) Tumblr
  • Click to share on LinkedIn (Opens in new window) LinkedIn
  • Click to email a link to a friend (Opens in new window) Email
  • Click to print (Opens in new window) Print
  • More
  • Click to share on Reddit (Opens in new window) Reddit
  • Click to share on Pocket (Opens in new window) Pocket

Filed Under: Cat Central, Pets Tagged With: cat rescue tips, domesticating a cat, feral cat, feral cat rescue, homeless cats

Ways to Keep Food Cold Outside

August 7, 2014 By LovingOurHome.com Leave a Comment

Here are a few simple ways to keep your food cold outside when throwing a party, barbecue or picnic!

When you are having an outdoor event in the hot summer sun, it can be a challenge to keep your cold foods cool. There are a few ways that you can go about maximizing the time that your cold food items stay at just the right temperature for the duration of your gathering. Regardless of the option you choose, make sure that you keep all of your cold items close to each other and far away from your hot food.

Plastic Cooler

Consider investing in a large heavy-duty plastic cooler like the Coleman Xtreme Cooler if you frequently have outdoor parties in the heat. These coolers can keep ice and food cold for about five days in very hot weather, like a small temporary refrigerator. They cost about $40 to $100 each depending on the size. Be sure to get the largest cooler available and place it on a short table. Place the food on top and allow your guests to help themselves.

“Ice Sandwich”

Purchase large bowls that are large enough to fit circular plates and bowls that will hold your cold food. Fill the bowls with ice and nestle the dishes inside of them. For example, you can have a large bowl, then ice in the middle, then a smaller bowl on top-like an ice sandwich.

Inflatable Kiddie Pool

Buy a small square inflatable kiddie pool. Fill it up with ice and nestle your bowls, plates, and trays inside. This should take care of most if not all of your cold food items. Wait until the very moment your guests start to arrive before filling the pool with ice and adding your food items. This idea is probably best for a kids’ birthday party or pool party. For a more classy, adult outdoor event, get an inflatable serving bar instead.

Dry Ice Pellets

Buy dry ice pellets for your party. These pellets can keep food cool for an extended period of time (sometimes up to two or three days). Insert the pellets in plastic bags-they should not come into directly contact with your food. Still, make sure the dry ice is “food grade” meaning that it should be reasonably safe to have in the presence of food.

Deep Freezer for Ice Cream

Position a deep freezer directly outside the house (if this is outside of a home) and run an extension cord inside or to an outdoor outlet to keep it running. Place your ice cream and other frozen treats inside of the freezer for the party. Make sure you put the freezer outside hours before the party so that it will have time to get ice cold.

As you can see there is more than only way to keep food cold outside for your upcoming outdoor event. Choose the option that best fits your needs and the theme of your party.

Share this:

  • Click to share on X (Opens in new window) X
  • Click to share on Facebook (Opens in new window) Facebook
  • Click to share on Pinterest (Opens in new window) Pinterest
  • Click to share on Tumblr (Opens in new window) Tumblr
  • Click to share on LinkedIn (Opens in new window) LinkedIn
  • Click to email a link to a friend (Opens in new window) Email
  • Click to print (Opens in new window) Print
  • More
  • Click to share on Reddit (Opens in new window) Reddit
  • Click to share on Pocket (Opens in new window) Pocket

Filed Under: Food & Recipes, Things That Make Life Easier Tagged With: barbecues, food cold outside, ice cream parties, keep food cold, outdoor parties, picnics, pool parties

DTV Transition: How to Watch TV Without a Cable Box

August 3, 2014 By LovingOurHome.com Leave a Comment

Here is a quick guide to help you understand how to watch television without a cable box.

After the Digital Television Transition ( DTV transition) that occurred back in February of 2009 non-cable subscribers were required to buy digital to analog TV converter boxes. After February 17, 2009, television stations stopped broadcasting over analog airwaves so only digital broadcasting is available. If you’ve recently cut costs by getting rid of cable, here is a quick guide to help you understand the technology and how to watch TV without a cable box.

© Andrew Taylor | Dreamstime Stock Photos

Analog vs Digital

Are you confused about the difference between analog and digital TV? In short, digital signals are sent out as numbers, 0s and 1s, bits of information like a computer, whereas analog signals are a continuous stream of information being transmitted.

Think of a digital clock that displays numbers versus a wall clock that “demonstrates” the time with a continuously moving arm. If a digital alarm clock is broken, it’s off, you can’t see anything. But if wall clock breaks, you can still see the hands and numbers. An analog television signal comes through an antenna or “rabbit ears” whereas a digital signal comes through a tiny “computer” (like a cable box or digital to analog TV converter box).

Why are They Doing It?

The main reason given for the digital transition is that freeing up the analog airwaves allows emergency responders to communicate more effectively. The only visuals on analog TV will probably be emergency communications from your local police and fire department. Also, broadcasters went over to digital transmissions because they believe it is more useful to consumers. It is also seen as a more efficient way to transmit television waves.

And of course many people speculate that the transition happened because of money. A number of companies made money from the digital conversion (cable companies, retailers, sellers of digital to analog TV converter boxes and electronics manufacturers).

What You Need in Order to See Basic TV Stations

If you already have a digital cable account with your local cable or satellite television company, you do not need to do anything. You should have a box that allows you to receive these basic stations. If you do not have cable or satellite TV you can buy a digital to analog TV converter.

The digital converters, which are available at most major electronics retailers, are available for about $40.

And if you have a pair of old “rabbit ears” antennas in your basement, you might have to dust them off! Once you have your digital to analog TV converter box you will need to hook it up to the antenna in order to get a strong signal. You will be given clear directions with the digital converter box.

So even if you have decided to get rid of your cable subscription to cut costs, you should still be able to watch TV without a cable box. Just make that one time purchase of a digital converter box and continue to enjoy your shows on network television as usual.

Share this:

  • Click to share on X (Opens in new window) X
  • Click to share on Facebook (Opens in new window) Facebook
  • Click to share on Pinterest (Opens in new window) Pinterest
  • Click to share on Tumblr (Opens in new window) Tumblr
  • Click to share on LinkedIn (Opens in new window) LinkedIn
  • Click to email a link to a friend (Opens in new window) Email
  • Click to print (Opens in new window) Print
  • More
  • Click to share on Reddit (Opens in new window) Reddit
  • Click to share on Pocket (Opens in new window) Pocket

Filed Under: Home Equipment and Appliances Tagged With: budgeting, cable box alternatives, cutting home expenses, digital converter box, dtv, network tv, saving money, watch tv

How to Write a Good Customer Service Letter

August 3, 2014 By LovingOurHome.com Leave a Comment

Here are some tips for how to write a customer service letter that will help you resolve issues with a company. Whether it’s a bank, a fast food chain or a cell phone company, the following tips will apply, and better your chances of resolving your customer service matter.

Remain Calm

You’ve just slammed the phone down in frustration after speaking with customer service at XYZ company. Before you pick up your pen, or turn on your computer to write that letter, sit down for a moment and take three deep breaths. Inhale, exhale; three times. Yes, that’s better.

Trust me, I know the rage that has built up when you have just gotten off of the phone with snotty Ryan, the 23-year-old kid who hates his job, has too much attitude, and refuses to help you. It is particularly infuriating when the situation directly involves a loss of money; your blood is boiling and you want to curse everyone out in sight. But you don’t want this to be reflected in your letter.

Address Your Letter to Customer Relations

Once you have taken a chill pill and are ready to write your letter, it’s time to get information about the company. You will probably easily be able to find the address of the corporate office online, or by calling their 800 number. In my opinion, it is always best to send a letter via snail mail rather than emailing, because when you have taken the time out to physically write, print, and spend 41 cents postage to send your complaint, the company sees that you are very serious. They will realize that you will probably not forget and go away so easily.

One point you don’t want to forget is to address the letter to “Customer Relations” both in the address at the top of the letter, and on the envelope you are sending the letter in. This way it won’t be routed to the wrong department and buried somewhere, most likely in the round file.

Don’t Talk in Slang and Curse

Depending on the size of the company, Customer Relations departments probably receive thousands of letters each week. So they are very used to reading people’s complaints. Cursing at them in the letter, calling them stupid, or ranting on and on about the bad customer service personnel you had an exchange with will most likely make them less willing to help you. They will assume that the customer service person you dealt with was probably right being that you are being so disrespectful to them in the letter.

So be nice and get to the point. Customer Relations didn’t sin against you — give them a chance to make it right. Write your letter in a reasonable yet firm tone describing your situation in detail, and include any figures, account numbers, names, and dates they would need to process your request. Your letter shouldn’t be over one page long.

End the Letter With a Specific Request

You didn’t really write this letter just to vent and complain, did you? Probably not, so make sure you are clear about what you want the company to do to resolve the matter. Give them your name and contact information so that they can get in touch with you to discuss the matter. They usually will call or send you a personal letter in response.

As someone who has written probably a hundred customer service complaint letters in her lifetime, I can firmly attest to the value of following this process. I would estimate that over 90% of the time I got what I wanted from the company, and we were able to resolve our differences based on the letter alone. So take your time to write a good letter with a request at the end, address the letter the appropriate department, and most of all, be nice.

Here’s one last tip: customer service departments almost always receive negative feedback in the mail. Once in a while, take the time out to write a letter of thanks or positive feedback when they’re doing a great job. You may be surprised when you receive a letter back thanking you with free coupons and other goodies for your gesture!

Posted by Jade

Share this:

  • Click to share on X (Opens in new window) X
  • Click to share on Facebook (Opens in new window) Facebook
  • Click to share on Pinterest (Opens in new window) Pinterest
  • Click to share on Tumblr (Opens in new window) Tumblr
  • Click to share on LinkedIn (Opens in new window) LinkedIn
  • Click to email a link to a friend (Opens in new window) Email
  • Click to print (Opens in new window) Print
  • More
  • Click to share on Reddit (Opens in new window) Reddit
  • Click to share on Pocket (Opens in new window) Pocket

Filed Under: Shopping Advice, Things That Make Life Easier Tagged With: correspondence, customer service letter, how to write a letter, writing tips

  • « Go to Previous Page
  • Page 1
  • Interim pages omitted …
  • Page 40
  • Page 41
  • Page 42
  • Page 43
  • Page 44
  • Interim pages omitted …
  • Page 51
  • Go to Next Page »

Primary Sidebar

Categories

  • Beauty Tips
  • Cat Central
  • Dating, Love and Relationships
  • Food & Recipes
  • Health and Wellness
  • Home Buying or Renting
  • Home Care and Cleaning
  • Home Decor and Design
  • Home Equipment and Appliances
  • Home Finance and Budgeting
  • Home Improvement
  • Home Tips
  • Life Thoughts by Jas
  • Light Simple
  • Motivation and Self Help
  • Parenting Advice & Tips
  • Parties, Events, Holidays, Fun
  • Pest Control
  • Pets
  • Product Reviews
  • Quick Tips
  • Quotes
  • Shopping Advice
  • Special Deals
  • Summer Products
  • The Funnies
  • Things That Make Life Easier
  • Uncategorized
  • Yard Work & Gardening

Copyright © 2025 · Genesis Sample on Genesis Framework · WordPress · Log in